Ribbon Inspiration ~ Stamp Simply Store – Words of Comfort
March 31st, 2012 by Holly McMillen
Happy Saturday!
If it’s Saturday, then it must be time for another Ribbon Inspiration post! This week we’re sharing words of comfort. If you’ve arrived here from Barb Schram’s Blog, then you’re in the right spot! I suggest you start back on Sharon Johnson’s blog in order to find out how you can be eligible for today’s blog prize. It is a mystery blog candy, meaning that the winner can be chosen from any of the blogs involved.
We all need words of comfort from time to time. Earlier this week I created an envelope card for just such an occasion. Sharon had shared it on her blog and a few people were interested in learning how I created the envelope.
Here is the original:
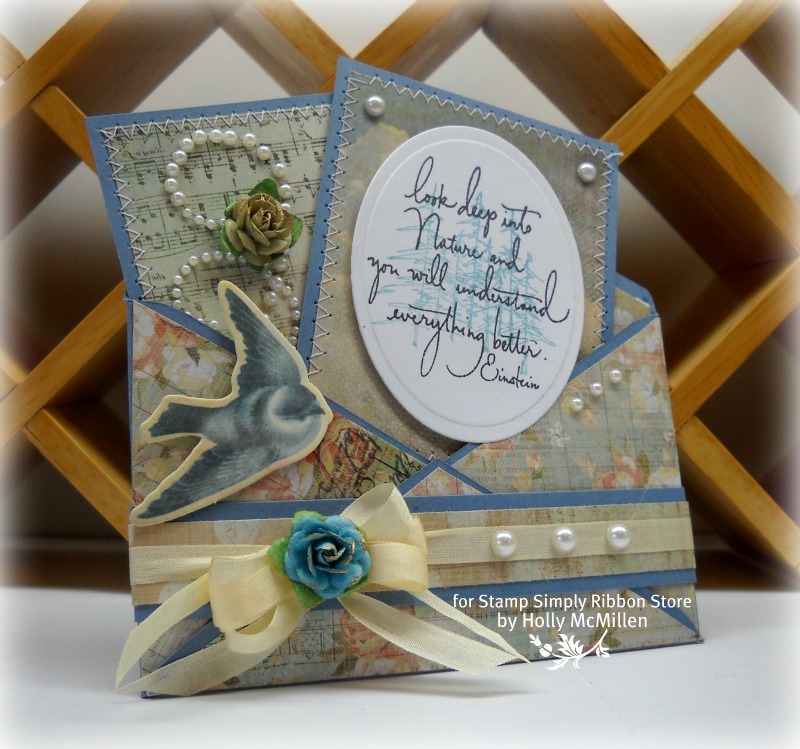
You can find all the details on this particular envelope card on Sharon’s blog HERE.
~*~*~*~*~
On to the tutorial…
You’ll need:
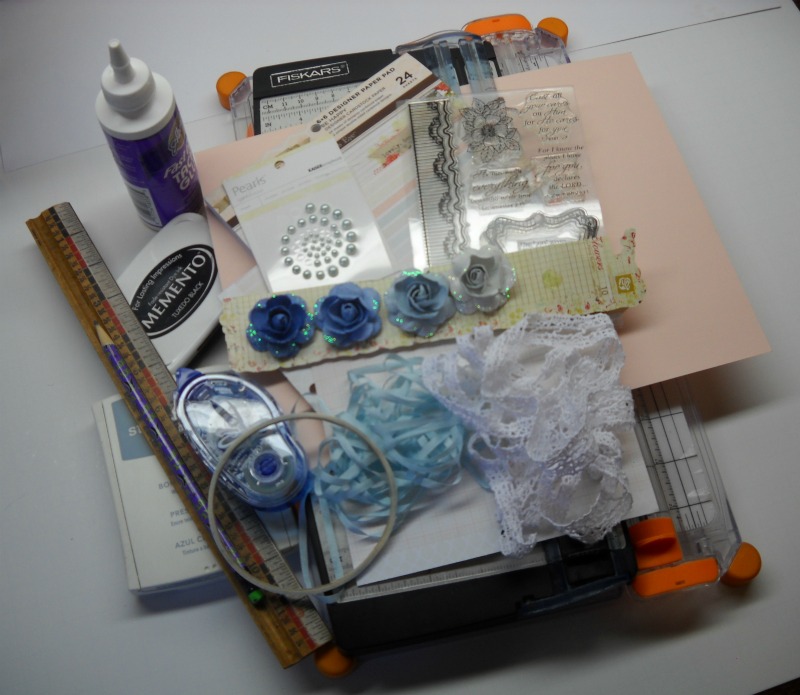
Step 1:
Cut a piece of cardstock (blush used here) to 11″ x 7″.
score on 11 ” side at 3″ and 8″
score on 7 ” side at 2 ” and 5″
~*~*~*~
Step 2:
On the 11″ sides, find the center point at 5 1/2″ and make a tick mark
On the 7″ sides, find center point at 3 1/2″ and make a tick mark
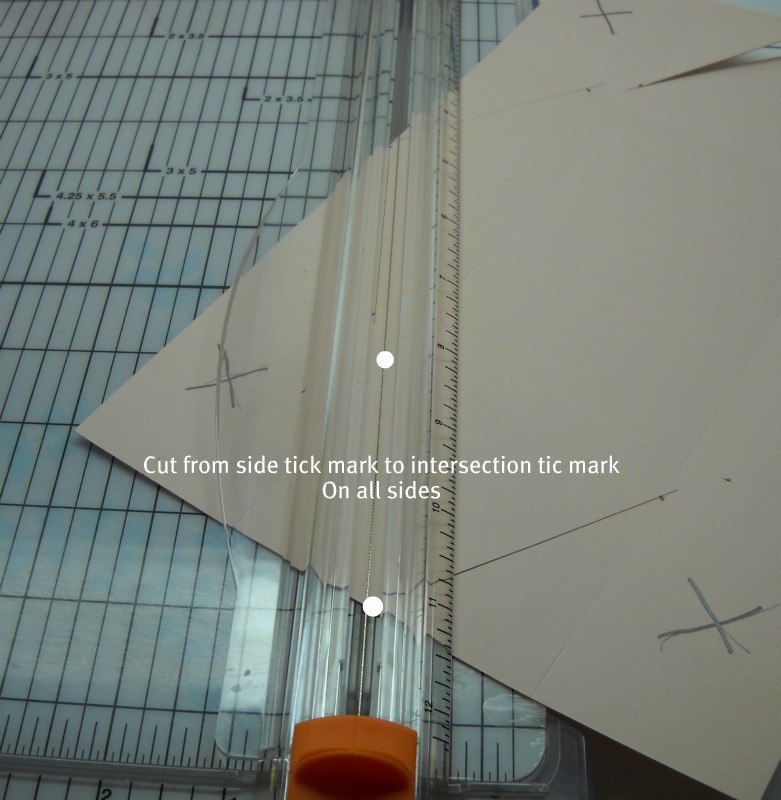
Make a tick mark 1/2″ from each “intersection” on the score line. (see pic)

Step 3:
Cut from center points on all sides up to the tick marks on the score lines. (see pic).
At this point you can cut the four corners off…
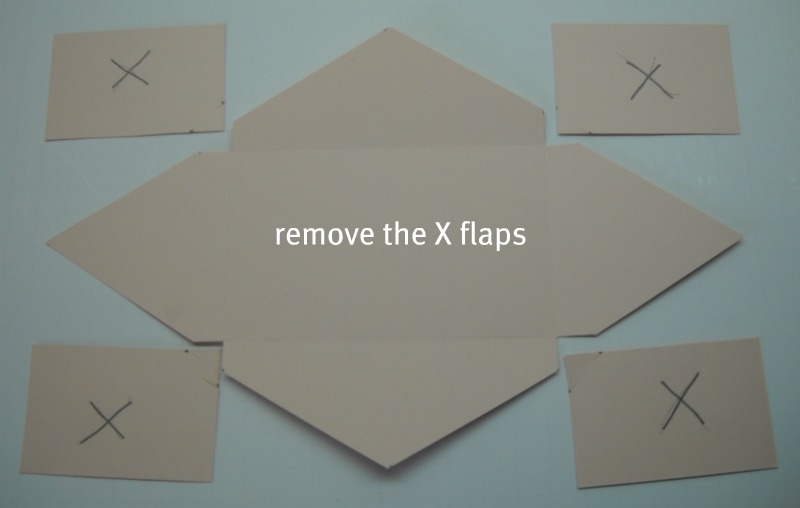
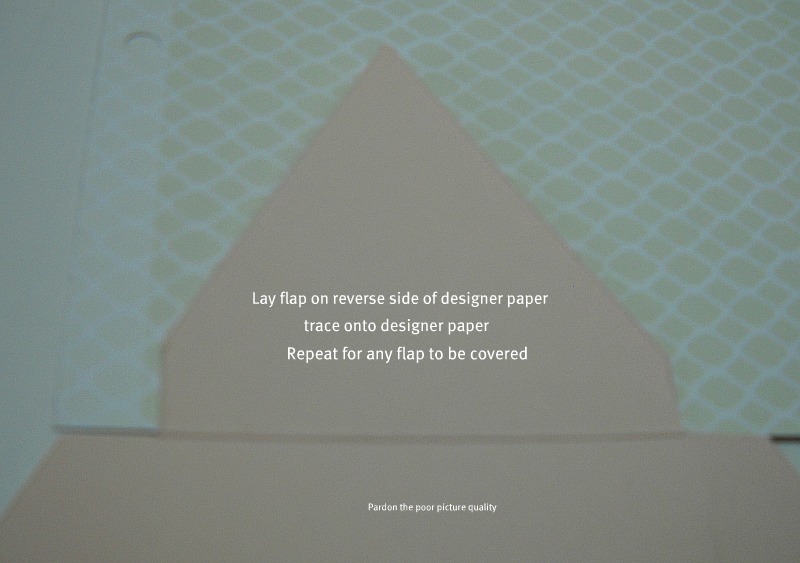
Step 4:
To measure the designer paper for the outer flaps, simple place your envelope at the edge of your designer paper and trace the two sides. If you’d like a reveal, simply take a ruler and size down the sides of the flaps.
Your inner liner is created by cutting a piece 4 1/2″ x 4 1/2″ and tapering the top 1 1/2″ to the top center.

After you apply your lining, use a strong adhesive to close the envelope up. Make sure you only use adhesive where the flaps cross or you won’t be able to fill your envelope!

For your inside panels, you can make them square as I’ve done, or you could use die cuts. My panels measure 2 3/4″ x 4″ (left) and 3″ x 4 1/2″ (right).
Mine are attached to the inside so that they will not move, but you could make them larger so that they can slide out.
And my final result….
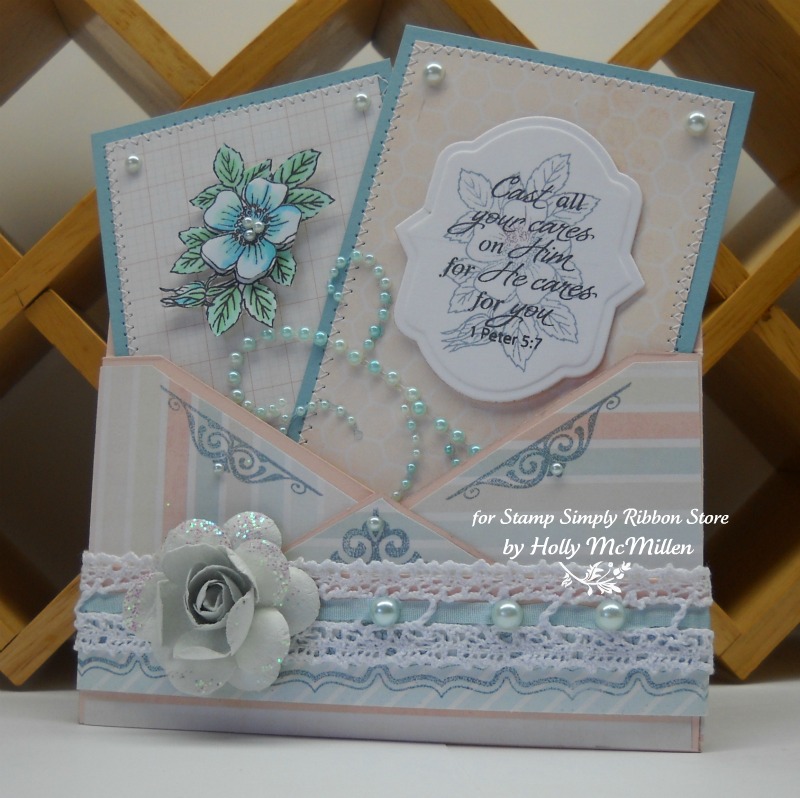
Here are my details:
Stamps: JustRite Stampers’ Cast All Your Cares, JustRite Stampers’ With Sympathy
Papers: Baja Breeze, Blush Blossom, GP White, My Mind’s Eye Be Happy dp (6 x 6)
Ink: Memento Tuxedo Black, Bordering Blue, copics
Accessories: 1/8″ May Arts silk (light blue) , 7/8th” Crochet Lace (white), Pearl Flourish (colored light blue with copic marker), Kaisercraft Bliss 1/2 pearls, Angelica Rose collection (Prima – Bonnie) , Nested Medallion Label dies, sticky tape, fast tack glue, dimensionals, sewing machine.
***** Items highlighted are provided by Stamp Simply Ribbon Store *****
~*~*~*~
Here are a list of all the blogs in today’s Inspiration Challenge:
Sharon Johnson – The Stamp Simply Ribbon Store
~*~*~*~
Thanks so much for stopping by!
Hugs!


Oh, Holly — I can’t thank you enough for this step by step tutorial. I simply ADORE both of these envelope cards you’ve made and I can’t WAIT to try one myself –I am definitely printing your instructions. THANK YOU SO MUCH! Both cards are so beautifully done!
That is so beautiful! Thanks for the tutorial too!
Gorgeous Holly! And a tutorial to boot! Thanks so much for sharing this beautiful design with us!
Holly, this is such creative artwork! Love the colors and embellisments that frame the wonderful quote. Thanks, too, for taking the time to offer this tutorial. Great job!
I love your project and thanks for the instructions.
Sympathy cards are the most difficult for me and I have one to make today….thanks for the inspiration.
Lovely blog candy, too, I might add….fingers crossed here. LOL
Such a gorgeous project! I’ll just have to make it but then I won’t want to give it away it is so lovely.
i really love the style of this card.. so unique.. and the verse is one i think i am going to have to order.. thanks so much for sharing..
just beautiful 🙂
Oh WOW; Absolutely Gorgeous and thank you for the step by step instructions.
ColleenB.
Such a beautiful project, thank you so much for the tutorial and sharing your project.
Thanks so very much for the tutorial on how you made this envelope card!! Beautiful!!!!!
Love the card- thanks for sharing the tutorial with us.
This is wonderful! Thank you for the detailed instructions for your great project!
This is just beautiful and I thank you so much for sharing how to make it. I must try this! Sadly, we never have enough sympathy cards; I wish we didn’t have to keep them around, but we do. This is a beauty and anyone who receives it would know your love came from your heart! Thanks for sharing it!
These are so beautiful, thanks for the tutorial, I’ll have to try one!
How very lovely. Thank you for the tutorial.
Your card is beautiful ,thanks for the step by step tutorial I’ll have to try one .
Marilyn
This is simply gorgeous!
Gorgeous card…soft and soothing to look at!
This is gorgeous, Holly! Thanks for the instructions on the base.
Gorgeous card! Love it all – the colors, dp, embellisments – all of it! Thanks for the tutorial too!
WOW, Holly how gorgeous!!! Thanks so much for sharing how you’ve created this beauty! Hugs and blessings, Sabrina
This is a Great Idea…and thank you so much for sharing the directions too..
The papers and colors you used just add to the beauty of the card.. then adding all the extras just pushed it over the top… Love the whole package!!
Absolutely FABULOUS!!! WOW!
Love it!
Oh … absolutely gorgeous! LOVE, LOVE, LOVE this – and, so appreciate you taking the time to do a tutorial. Going to have to attempt this. Thank you for the inspiration!
Beautiful card and very gracious of you to provide the tutorial! Thanks so much.
Can’t thank you enough for sharing duch great detailed instructions for your amazing envelope card. Can’t wait to try it!
This is a beautiful project and thank you for sharing the tutorial
Your cards are absolutely gorgeous! Thank you for the tutorial.
Beautiful cards and thanks for showing us how.
Such a unique card! Beautiful!
Gorgeous card!
How creative and what a lovely card. Thanks for sharing with us.
Oh my – how gorgeous – soft and feminine. Such beautiful crocheted/silk lace with the added pearls. Your colouring on the flower is perfect. Wonderful sentiment.
Lovely card sympathy card. I like the soft,comforting colors.
I want to give your card idea a try, thanks for the tutorial.
What a beautiful card! Thanks for the tutorial!
Your envelope cards are stunning. Thanks for the tutorial. I have to give it a try.
Great project and tutorial.
Tina
[email protected]
Holly as usual your card is beautiful. Thank you for generously sharing the tutorial. TFS 🙂
absolutely beautiful! thanks for showing how you made your card.
Loved your card. Thanks for the tutorial. I am going to have to try this. Is stunning!
oh that is just one stunning card!!!
Gorgeous card. Thanks for the great tutorial.
Fabulous envelope pocket card Holly. The colors are lovely.
Wow is this fabulous! Love the color combo and all of the PEARLS! Thanks for the tutorial.
Lovely project! Thanks for the tutorial… I’ll have to try this!
DeniseB
This is a heavenly card, the colors are just yummy. We all appreciate the tutorial.
thanks for the step by step instructions! I’m going to try making this – yours is absolutely lovely!
That is sooooo gorgeous! I love the instructions too, will have to make one soon! TFS!
Fabulous tutorial, thanks for the inspiration.
Super cute, the colors and embellishments sure speak very pretty, thank you for sharing the tutorial.
What a beautiful card! Love cards that have a little extra something like this envelope card! Great tutorial too! Thanks!
Very beautiful card. Thanks for the mini tutorial. Thanks too for a chance to win blog candy.
gorgeous creation, holly. thanks for the envelope card deets too.
Beautiful card! Thank you for the tutorial; will try it myself.
Beautiful card…elegant even. Love the message on the card as well…how appropriate for many occasions.
Thank you for the envelop tutorial! And it’s such a pretty card.
Oh what a stunner Holly, and thanks so much for the details on how to do, will have to try that this weekend, going to be a quiet weekend for us, so will give me something to do.
Have a great Holiday.
hugs
Donna
That’s all I can say. You most definitely have made this blog into something that’s eye opening and important.