~ A Thursday Tutorial…….On Wednesday?~
February 4th, 2009 by Holly McMillen
Good Evening ya’ll……
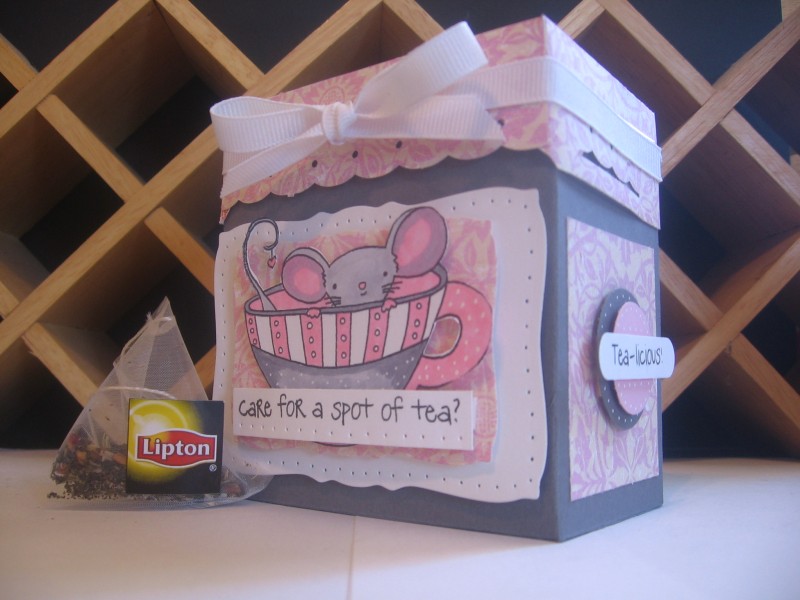
I have had several people interested in a tute on the TEA BOX that I created here:
~~~ Remember, All pictures are ‘clickable’ to make larger size ~~~
Well, first, I gotta tell ya why I am going to post the Thursday Tute on Wednesday evening…. Yesterday, my DH was at work (he’s a carpenter) and he fell off a scaffolding and was hurt quite badly. We have been nursing him back to health all day and it looks like it may take a few days to get him back to par. We are not quite sure, but we think he has a broken rib or two. Unfortunately, we have no health insurance and his employer is balking because he was not wearing a harness, so we are fighting to have it claimed as a workman’s comp claim.
Soooooo.. I need to post this tonight as we have no idea what tomorrow is going to bring.
Here is what you will need:
1 piece of cardstock cut to 10 1/4″ x 8 1/4″
1 piece of designer paper (heavy is best) cut to 6 1/4″ x 4 3/4″
scoring blade
sticky tape
border punch (if desired)
stamps and etc to decorate
Optional: I used a piece of velcro as a fastener for the lid, but it is not required
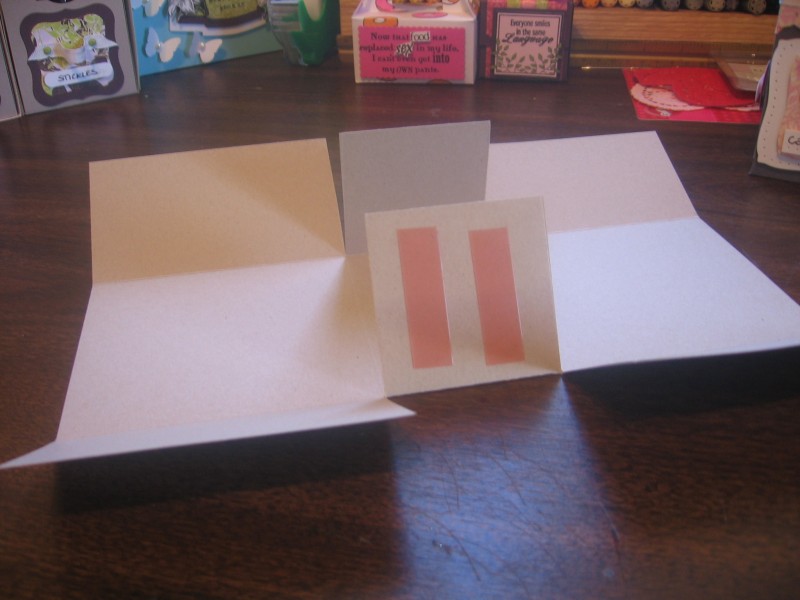
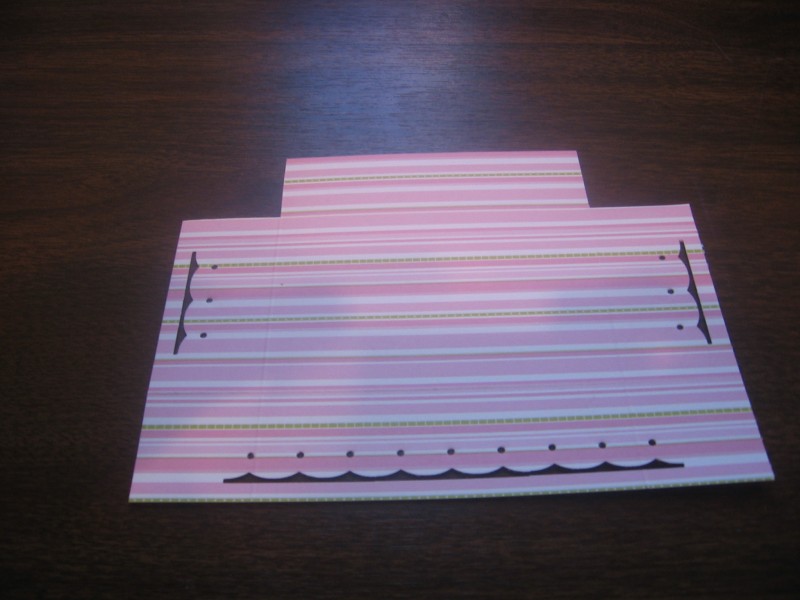
Step 1: Score the 10 1/4″ x 8 1/4″ sheet as follows:
Short side: at 2 1/4″ and 6″
Long side: at 4″ and 6 1/4″
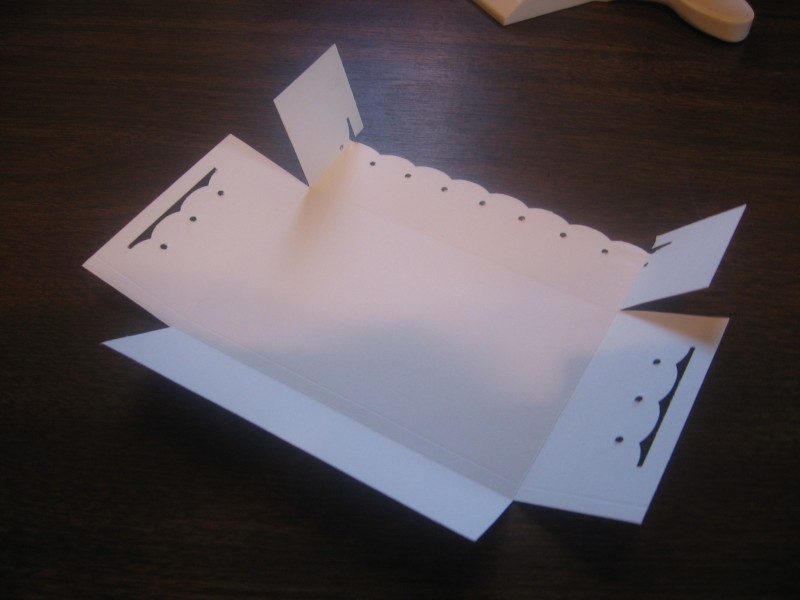
Step 2: Cut the middle tabs as shown in the example pic.

Apply sticky tape to the OUTSIDE.
Step 3: Fold the tabs into either side (makes no difference) and adhere.
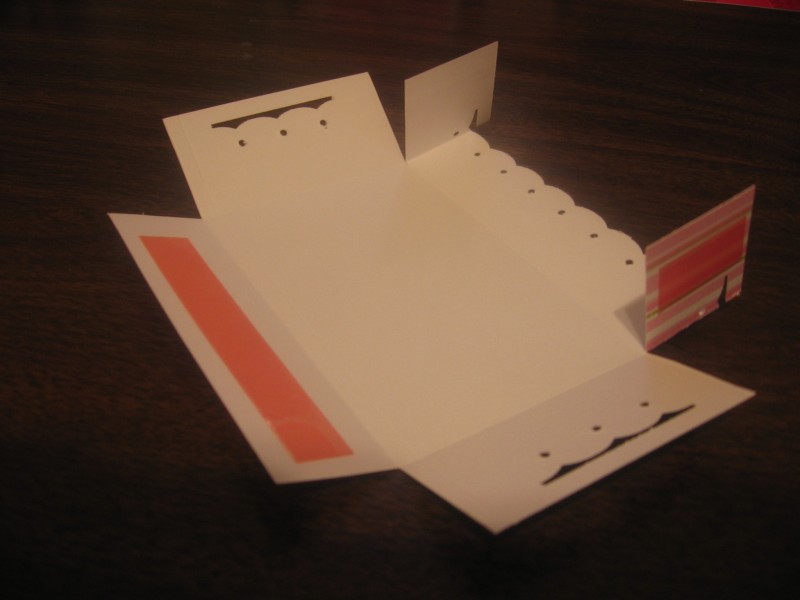
Step 4: Apply sticky tape to the INSIDE of the outside tabs as shown in the example pic
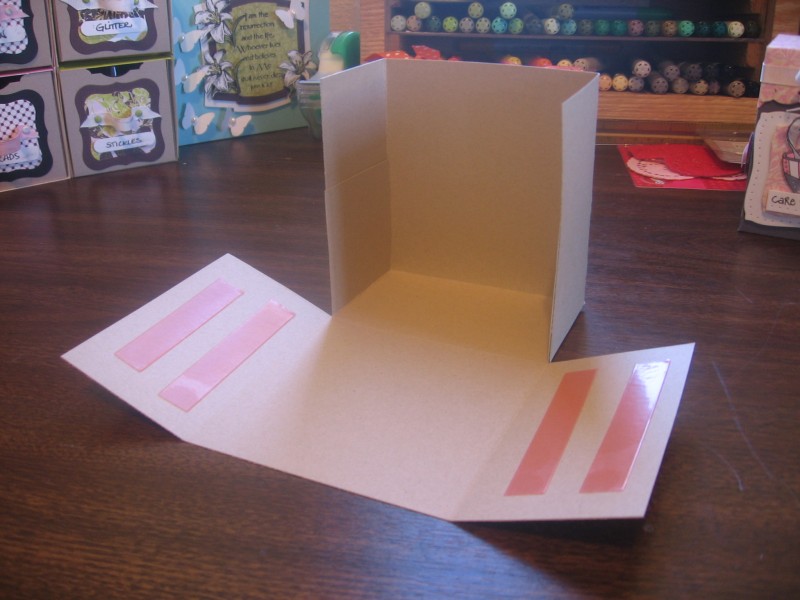
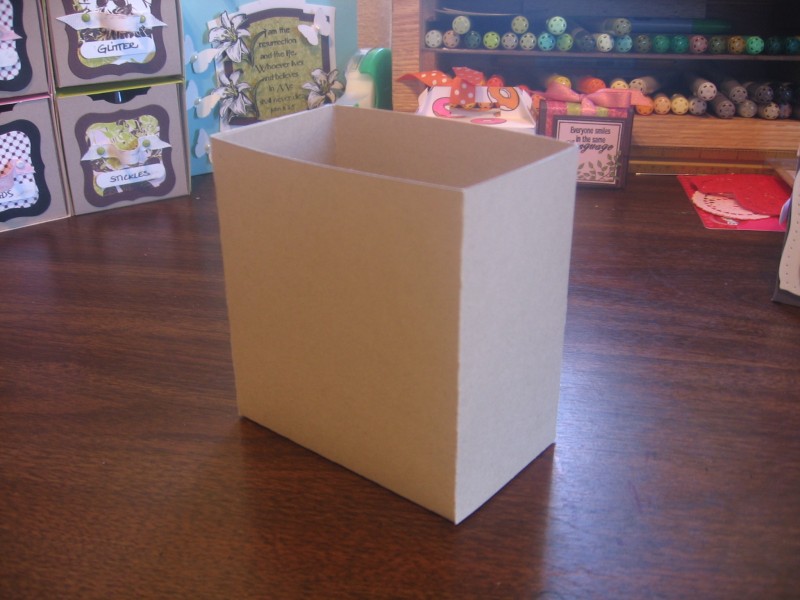
Step 5: Fold the box sides up and secure tightly.
Step 6: Score the 6 1/4″ x 4 3/4″ designer paper as follows:
Short side: 1 1/4″ and 3 3/4″
Long side: 1 1/4″ and 5″
Step 7: Cut out the small tabs as shown in the example pic (marked with X)

Step 8: Punch your border as desired.
Step 9: Cut the small tabs in from the sides to the score lines as shown in the example pic.
Step 10: Apply sticky tape to the tabs and fold in.
Step 11: Apply sticky tape to the small back tab (this will adhere to the back of your box).

Step 12: Assemble lid to your box.

Step 13: Decorate as desired!
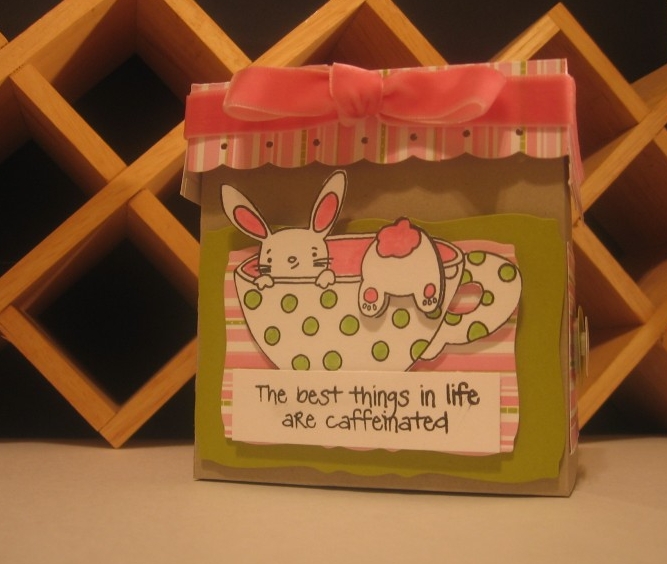
Fill your box with tea bags or coffee samples and send to a friend! :)~
I would love to see the boxes you create… please link back here so I can see your creations!!
~*~*~*~*~*~*~*~*~*~*~*~*~*~*~*~*~*~*~*~*~*~*~*~*~*~*~*~*~*~*~*~*~
Ok, back to nursing the injured man… :)~ Hope you all have a wonderful evening!
~~~ Holly ~~~


Holly, this is so cute…You know from stamp club I am not good with boxes…but I appreciate the tutorial!
Hope your DH gets well soon!!
Blessings,
Traci M
Thanks for the tute. So sorry to hear about your DH’s injury! Hope he heals quickly and things work out favorably.
Thanks for the tutorial Holly – I have only just started making boxes and I’m going to have to give this a go!!
I am horrified to hear about your poor DH!!!! What dreadful news, I hope he will get better soon and everything works out. Your health system is very different to ours.
(((HUGGSSS))) to you darling you are so wonderful to think of us when you are suppose to be w/your DH and giving him some love. I hope he feels better ASAP… I must ask where do you get all your amazing ideas! I can not even begin to even “try” to make something like these amazing creations! I can’t wait until you make the tutorial for the 2nd part to the Desk accessories!
Hugs and blessing to you…
Oh, no!! I hope he feels better soon. I’m praying for him and you.
The box is awesome!! I can’t wait to try it! Thank you for the great tutorial, too!
Holly, tell Don that Greg and I are lifting him up in prayer today! The great physician will take card of him!
Oh dear Holly! Sorry to hear of your husband’s accident! I hope all will be okay. Sending prayers your way…
Oh no Holly. I’m so sorry to hear about your DH. I hope he’s on the mend quickly. Thanks for taking the time to post this tutorial … now get back to your injured hubby 🙂
Hugs,
Teresa
Thank you for the tutorial. Hope your husband heals vety quickly.
Great box! So pretty! And a GREAT tutorial!!
Hey there Holly! I got my tea holder done! Hope DH is feeling better and you too!
http://www.splitcoaststampers.com/gallery/showphoto.php?photo=1224797&cat=5661&cat=500&ppuser=109104