~Easy Peasy Ribbon Tutorial~
February 27th, 2008 by Holly McMillen
 Ok, you all asked for it, and I am ready to share my ‘easy peasy’ bow with you all. Please pardon my less than professional pictures. I needed a spare set of hands, so my son Levi did the picture taking for me. He’s really good, but the camera is just old.
Step 1:
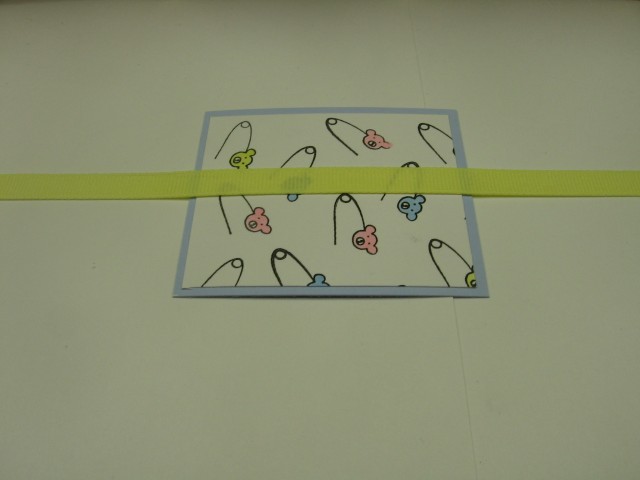 Cut your base color ribbon long enough to go across your cardstock and around behind for attachment. Lay it flat on your workspace.
Step 2:
 Cut 2 or more pieces of contrasting ribbon (I use about a 3″ strip) and lay it crosswise on your base ribbon.
Step 3:
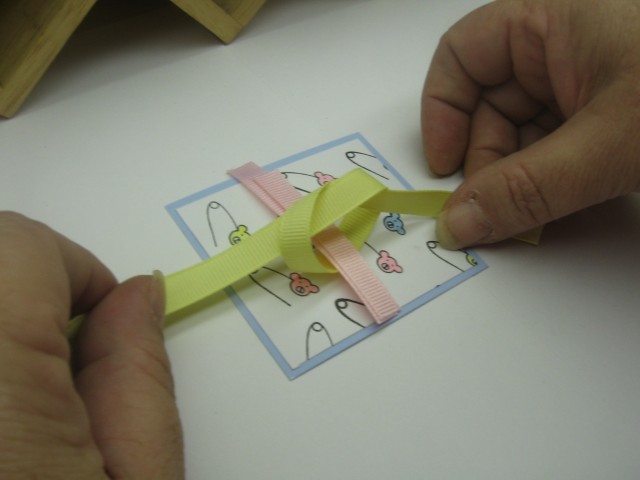 Tie your base ribbon around your contrasting ribbon.
Step 4:
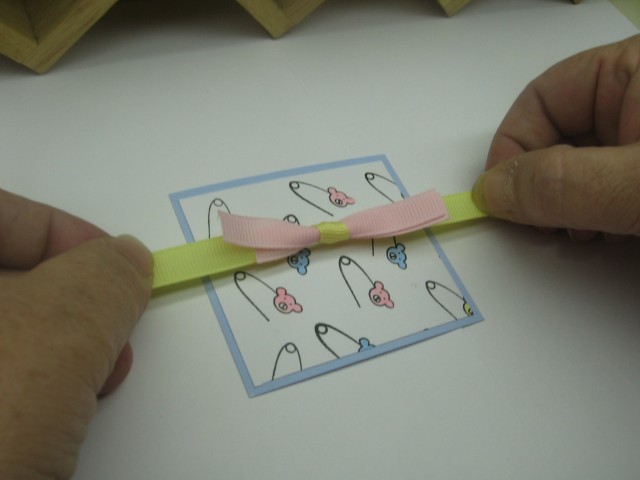 Pull ribbon tight and straighten.
Step 5:
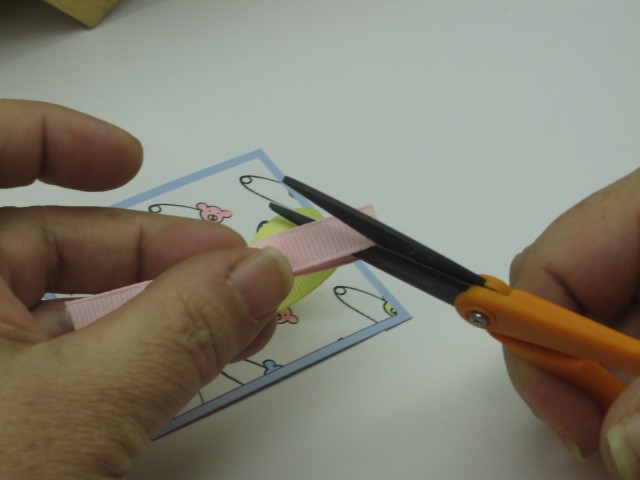 Trim ribbon edges to desired length
Step 6:
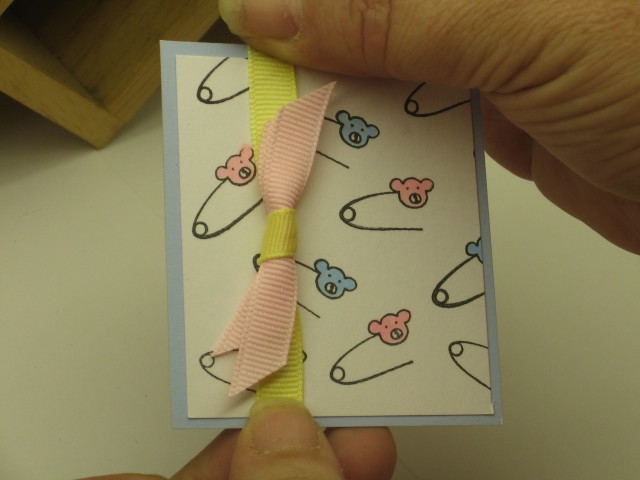 Attach ribbon to card!
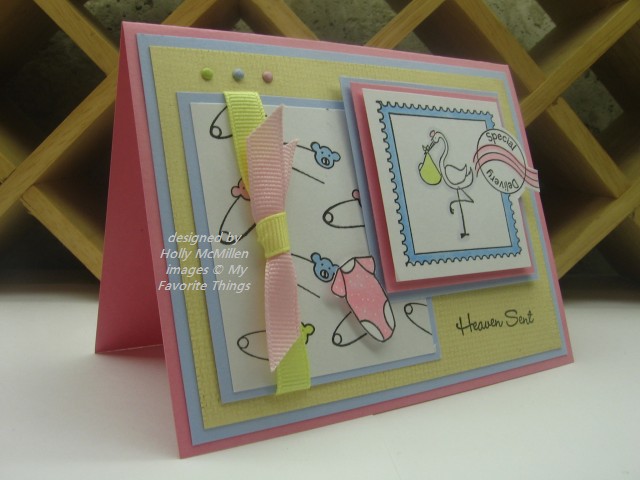
This is my first time doing a tutorial.. please leave feedback!
Here’s the deets:
Stamps: My Favorite Things’ Baby First
Colors: Regal Rose, Bliss Blue, Barely Banana, GP White
Ink: Brilliance Graphite Black, copics, white gel pen
Accessories: mini brads, ribbon, dimensionals, scissors
TFL!~ and have a blessed day!


Nice tip – always love the ribbon(s) on your cards. . Thanks for the step by step and a thanks to Levi for his photography — hope his hourly rate isn’t too high 😉
Thanks Holly-You explained perfectly. Nice bow technique…tfs
Great tutorial – thanks for sharing! Love how that bow looks, and now I’m excited to try it for myself!
It’s a great tutorial, Holly! Great bow!!
Gorgeous job. Thank you so very much. Your son should be a professional photographer. He did an awesome job.
Thank you so much for sharing.
Big hugs to you both.
It’s an awesom tutorial and technique! Who would’ve thought this is your first tutorial!
Thanks for a wonderful tutorial Holly! You make it look so easy, but I won’t say it is easy until I have tried it! LOL
Oh very cool Holly! Thanks so much for explaining!! Your son did a FAB job helping out!
Holly…. awesome tutorial….Thinking I should visit your blog everyday!
Love ya
Holly, fabulous tutorial! Half the time it takes me longer to try to get my ribbon knot perfect than it does to make the card, LOL! I love this idea for ribbon, I am trying this right now!
Well, that is just plain neat! Thanks for sharing that. Great tutorial. I just clicked on each pic and opened in a new window to make it bigger.
Your tutorial was great and is your card is adorable!!
Thank you. Very clear to understand.
Thanks Holly – very easy to follow and the bow looks great! 🙂
This is a wonderful tutorial! I am going to give this trick a try tonight 🙂
Now that you’ve done such a nice job on this one I can say, “More, more, we want more!”
That looks too easy! Thanks for sharing, I love your creativity!
OMG, Thank you so much Holly! You are right – it is easy peasy!
Thanks for the easy peasy ribbon tutorial. Saw someone mention it on SCS this morning. Neat Blog! tfs
Bev J. (Maxell on SCS)
Wonderful tutorial!!! That’s a really nice bow! TFS!
Thanks, Holly for this super tutorial…can’t wait to make one of these cute bows!!
Diane
Super tutorial!! Love your sweet bow too! TFS!!
I was just about to ask you about the bow when I saw that you did this tutorial. Thank you so much. You are one of my very favorite stampers!
Hey Holly! I just made a card using your easy peasy ribbon technique and I just wanted to say ‘Thanks!!” What a great technique!!
Thank you SO much for this. I have heck’s own trouble trying to tie ribbon (blame it on being left-handed) but this is such a simple method even I can achieve! The tutorial is all-round first class.
Marion
UK
Well I’m a lefty too so this has helped me as well. Thanks for demonstrating this great ribbon technique.
Ter
Ottawa, On., Canada