~ Christmas in the Air~ Wreath Windows ~ Part 1
November 20th, 2016 by Holly McMillen

I have a very special project to share with you this week. This is the first part. The wrap up will be posted on Thursday, November 23rd.
I’ve been very excited to do this project, which was born from a post I saw on Pinterest. I cannot post the entire picture, as I do not have the owner’s permission. However, the header above shows a piece of my muse.
I’m calling them window wreaths, for now. For my project, the frames were made by my husband and I’ve added photos below to show his process. Honestly, it was so simple that I know I could do it myself. You can also shop your favorite reclaimed store for an old window frame!
First he ripped the wood down to create a frame 15″ wide on the inside and the frame itself is 3″ wide.
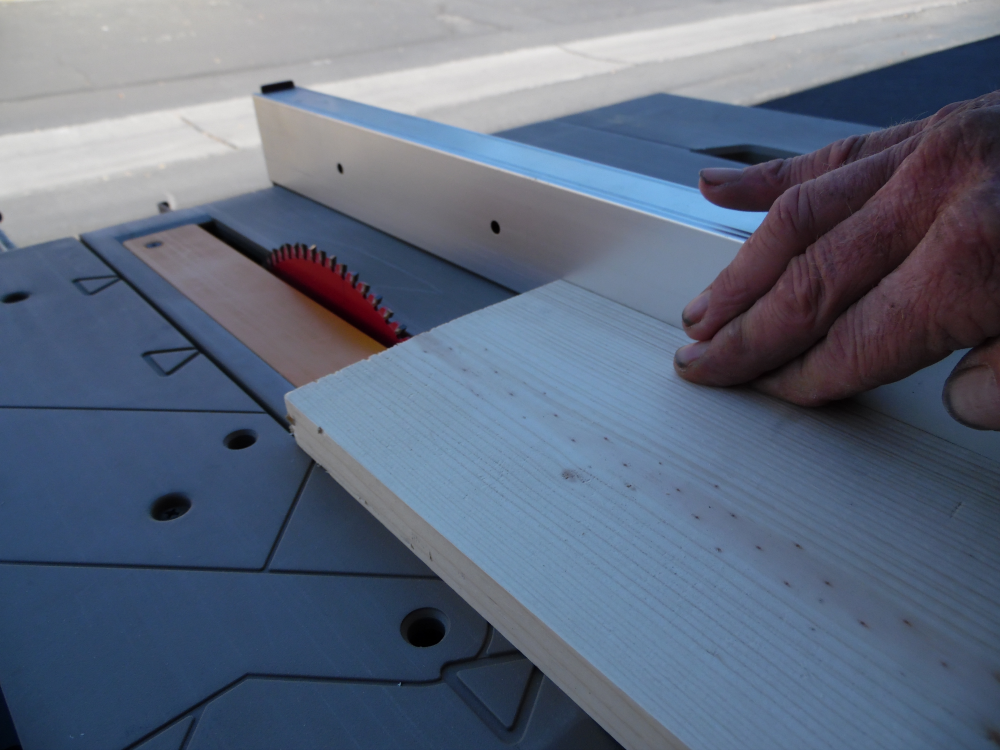
1″ x 6″ Pine (chosen for light weight) . Rabbit cut / recess for plexiglass.
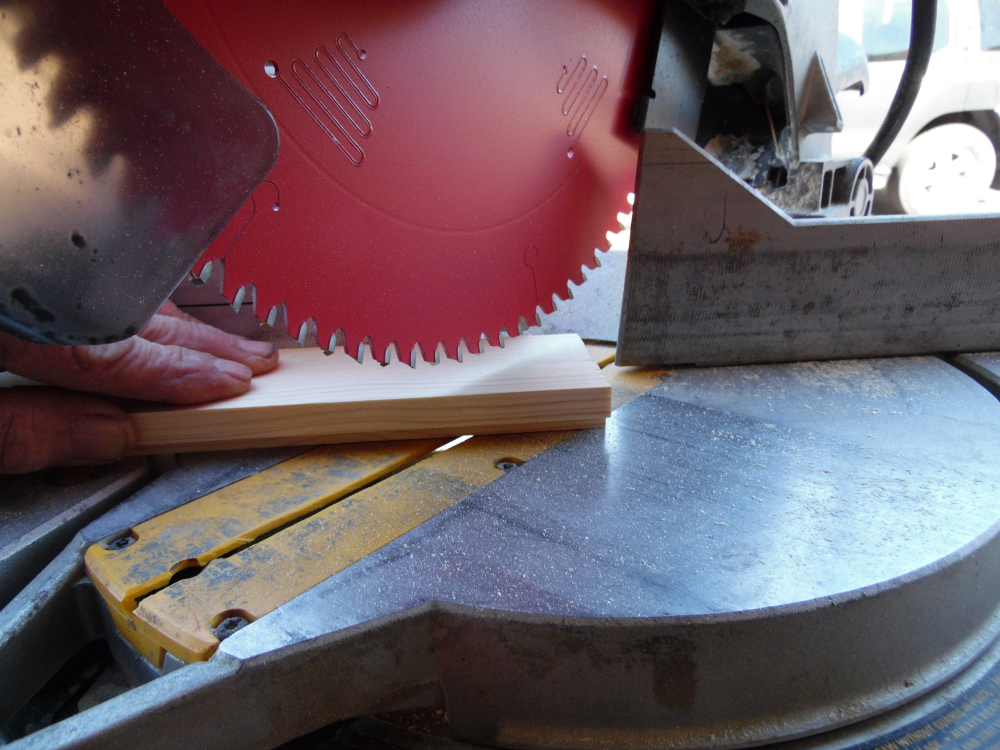
Using a compound miter saw cut corners at 45 degree angle.
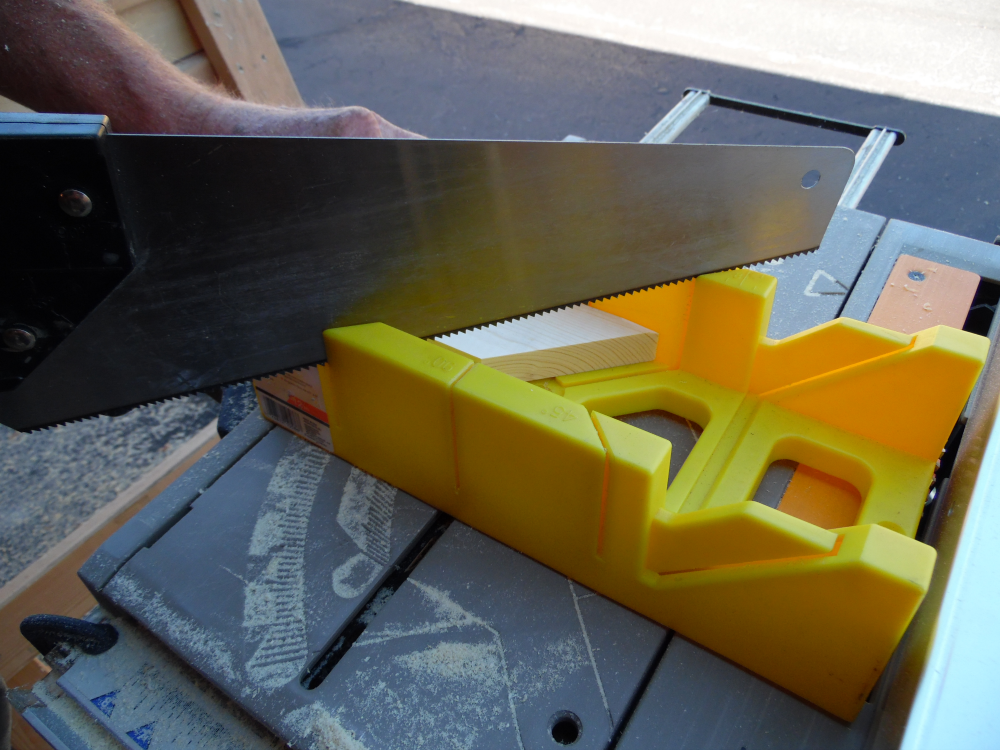
If you don’t have access to the electric saw, you can do the same with a miter box.
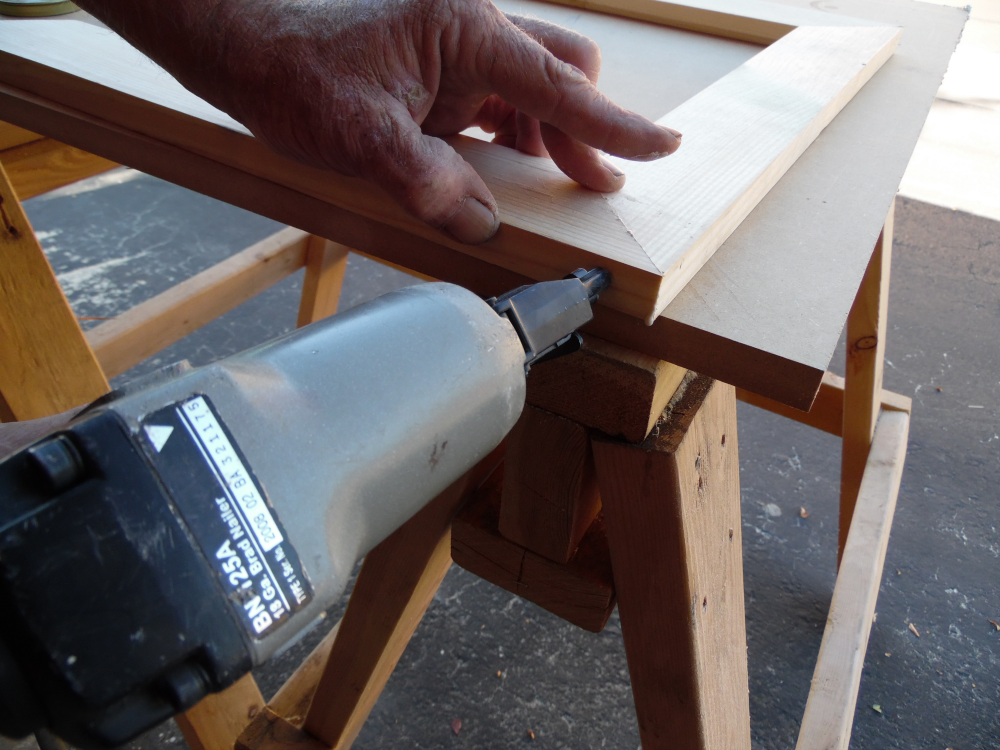
Corners were glued with wood glue then pin nailed together.
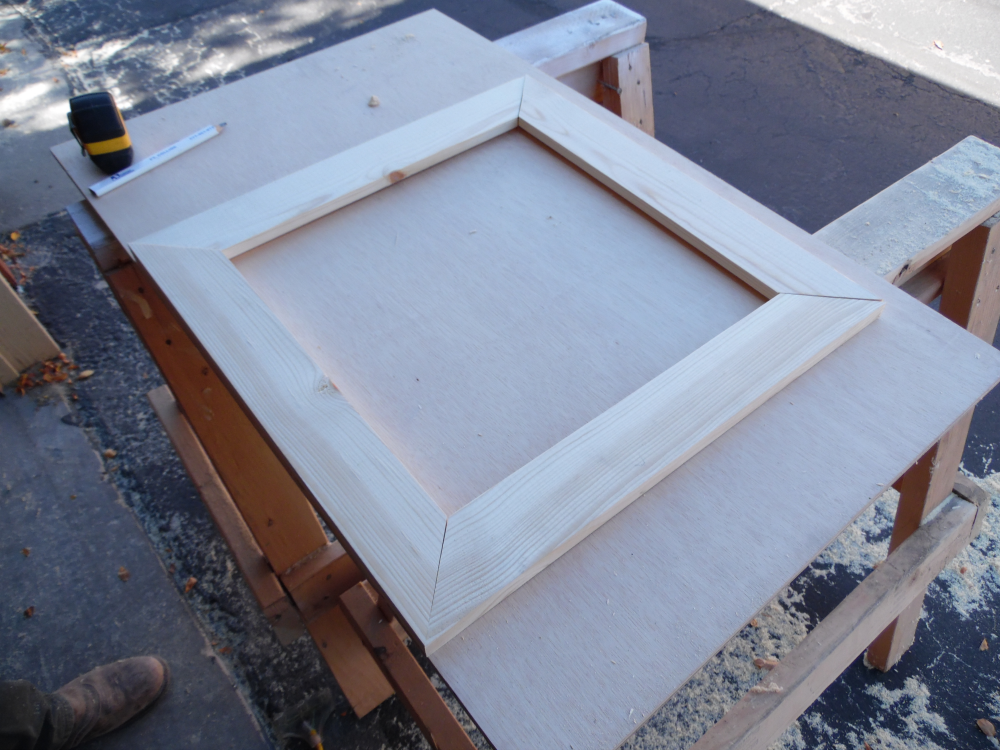
Ready to paint!
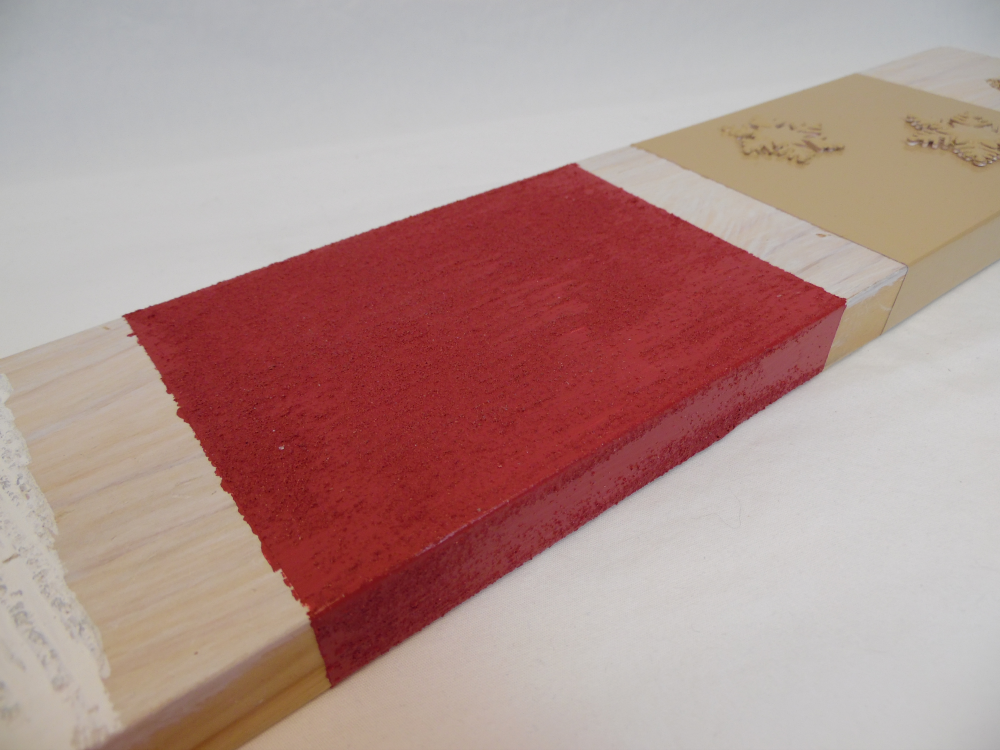
I did a test run for my three different textures.
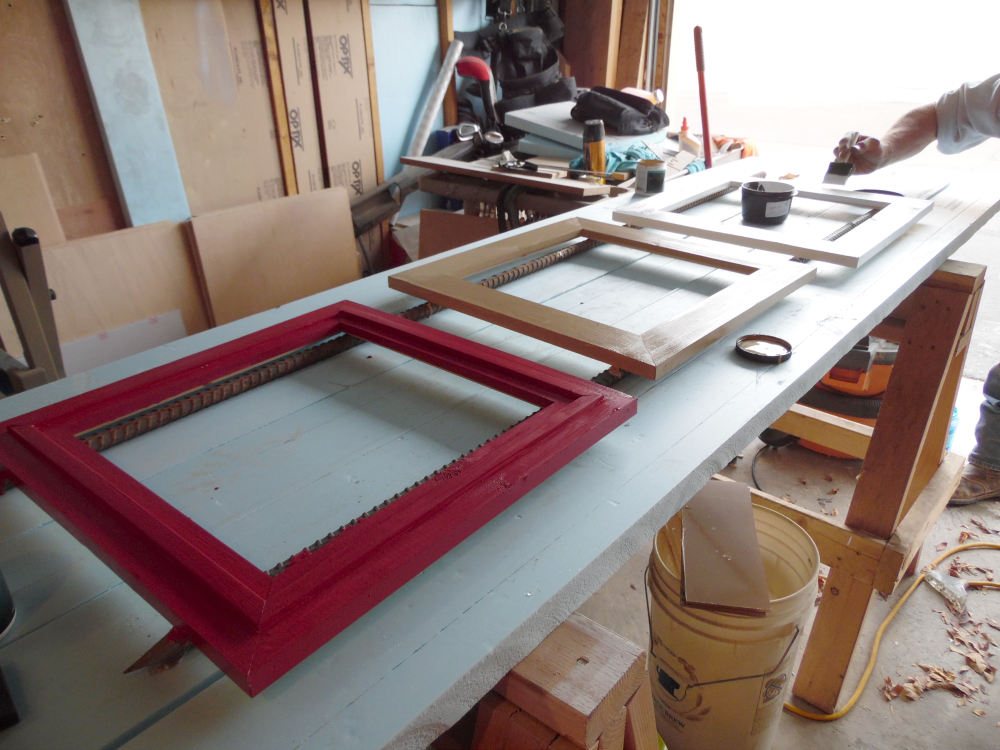
Red frame has a sand mixture added to the paint. The texture is rough with a lot of interest..
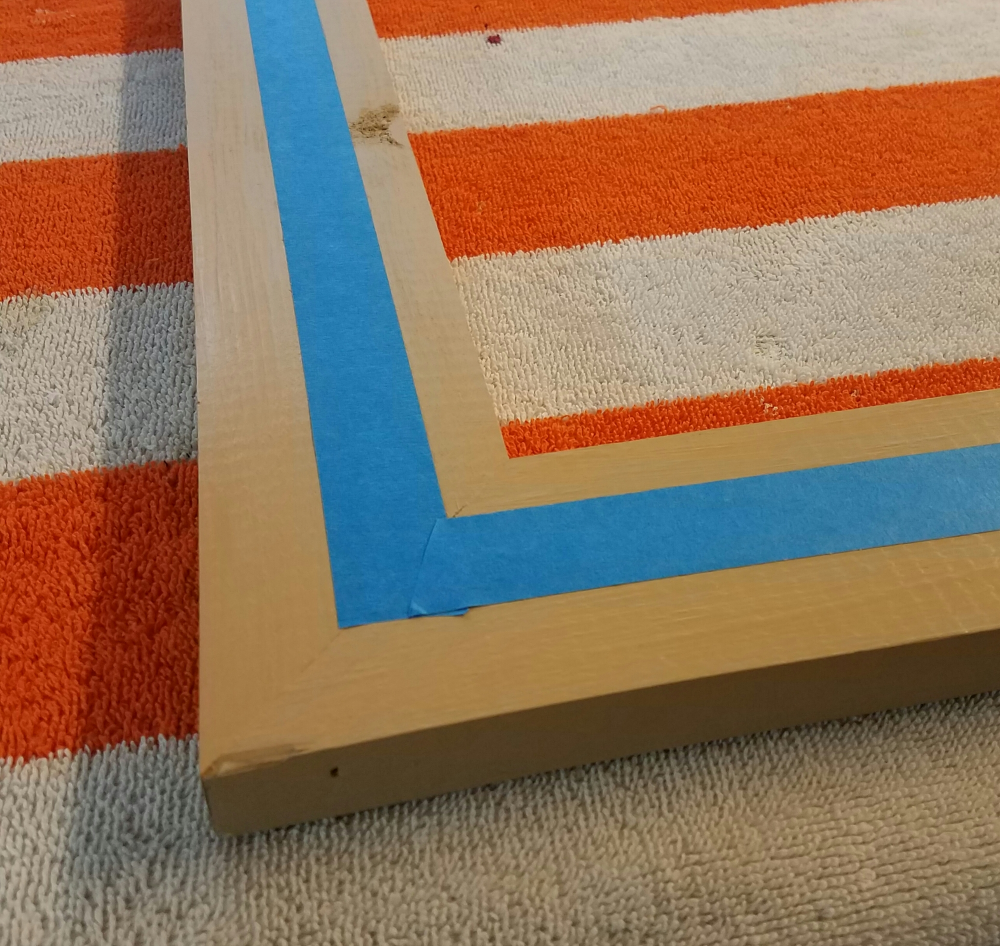
The tan frame was taped off where the trim (1/4″ x 3/4″) would go.
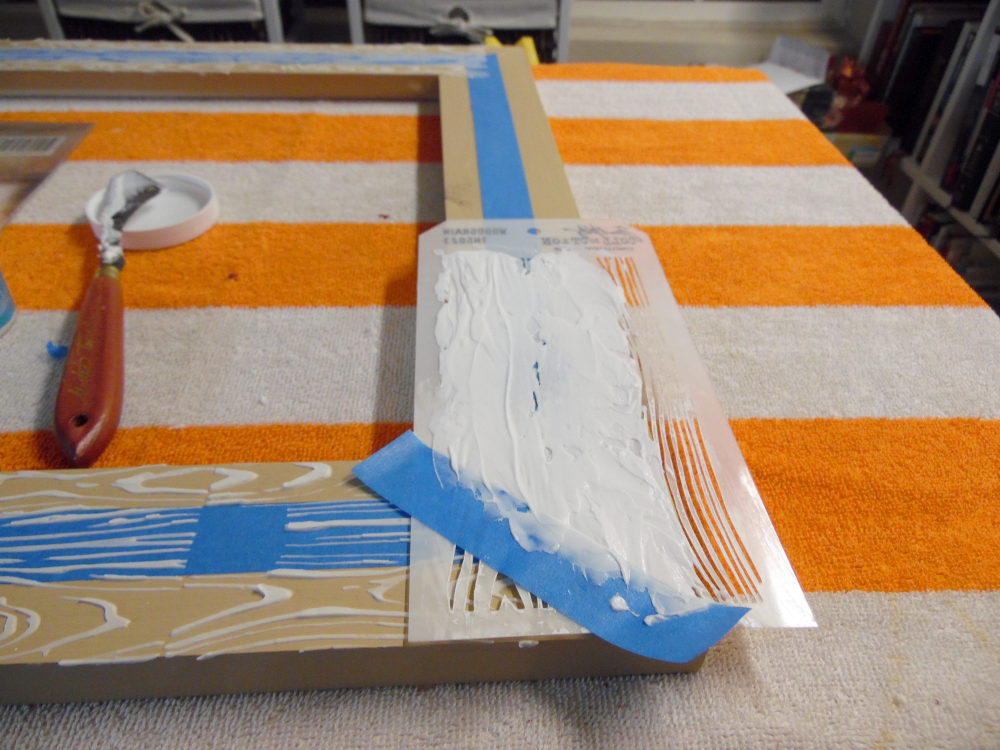
Using Tim Holtz woodgrain stencil and
Dreamweaver Embossing Paste – Regular White
I painted two coats after the trim was put on. I have a little extra addition coming up!
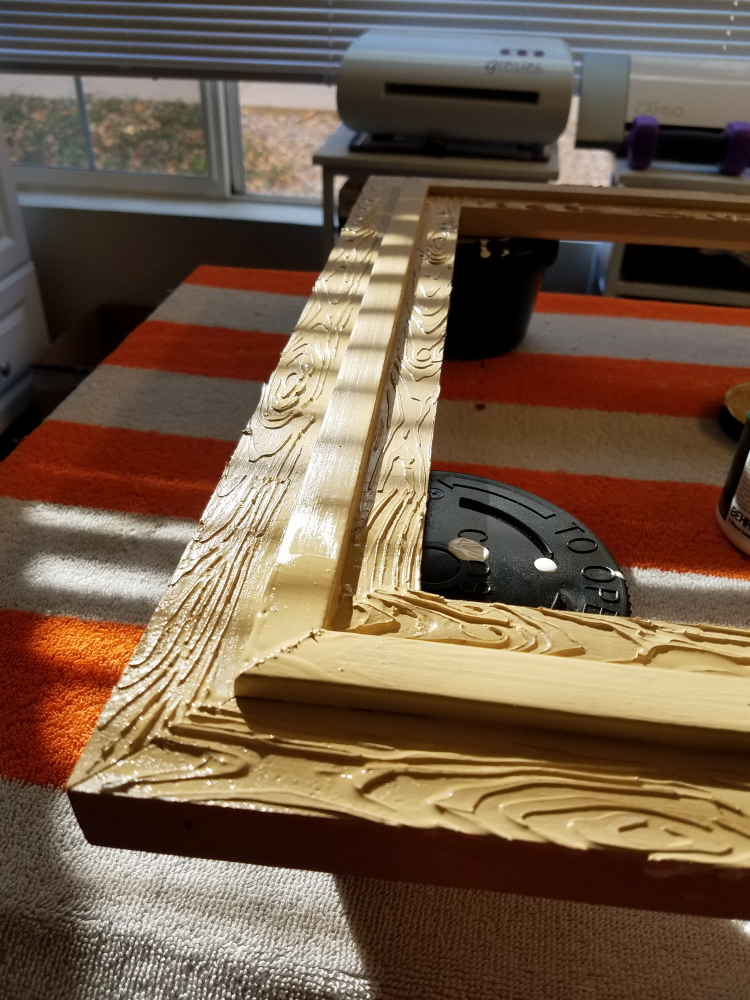
I sponged on some Memento Rich Cocoa ink over the relief areas and let it sit to dry.
Now they’re off to the garage again to have plexi-glass installed!
~*~*~*~
I’m up to my eyeballs in ribbons and such. I’ll be back in a couple days with the wrap up!
Thanks for stopping by! Come back soon!
Part 2 of this post can be found here.
~ Holly

