~ Gemini is coming! Gemini is coming!!
June 30th, 2016 by Holly McMillen

July 6th!!
Mark your calendars! The LARGE platform on this die cut/embossing machine is the bomb. Do I large cut or several small cuts. You can get more done and done easier with the electric feed.
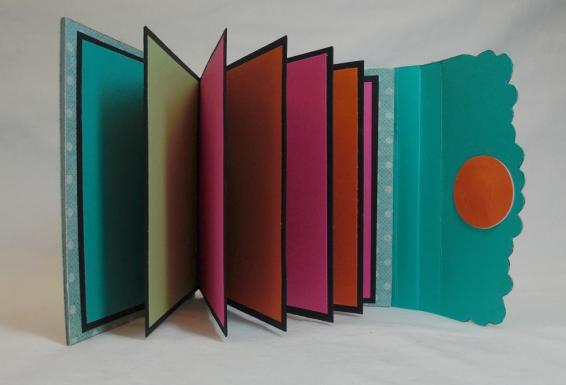
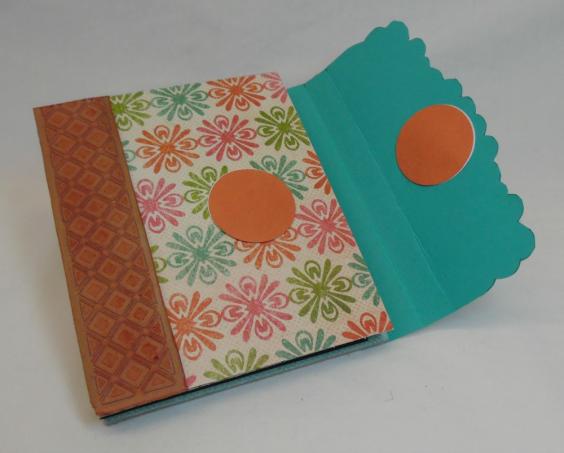
For my last project with the Crafter Companion team, I created this little book. It can be anything you want it to be. It measures 5 1/4 x 4″. Maybe a grandmas’ brag book? It could be a note book if you add white lined papers attached with repositional adhesive.
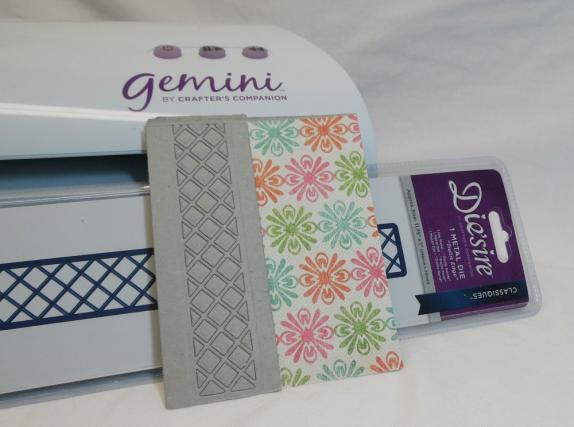
I did not have any regular chipboard, so I used this thick backer board. I knew the machine would not actually cut through (this stuff is VERY thick… but what it did was emboss the image deep into the chipboard. I was so happy with the result. I cut a piece of chipboard for both front and back. Patterned paper was adhered to the front, inside front, inside back and back cover.
The inside is made of 4 3/4″ x 7 1/2″- scored in half. I did several. They are simply glued back to back.
The circles hide magnets that are 1/2″ round by 1/16th inch thick. They are super strong.
The trellis piece was sponged with a deep rust ink.

I used:
Gemini die cut and embossing machine
Die’sire Edge’abilities Renaissance due
Die’sire Trellis Edge
Other:
Chipboard
Patterned paper and solid colors to coordinate
Magnets
E6000 glue
~*~*~*~*~
My farewell to the Crafters Companion team is bittersweet. I enjoyed working with the team, but I am looking for that these next few months have in store for me!
Thanks for stopping by:
~~Holly

