~Pink Prayer Purse and Tutorial ~
January 12th, 2011 by Holly McMillen
Hello, Friends
I will warn you right up front…. this post is going to be long and picture heavy. I’ve been a busy girl today. I hit the studio at about 8am this morning and finally emerged at 4:30 pm. Um, pizza anyone? LOL Sorry family, dinner was not on my schedule.
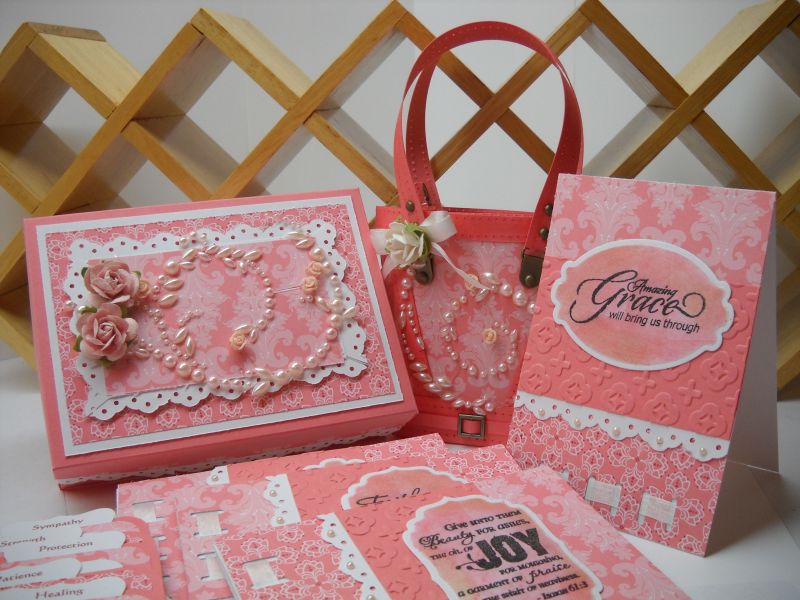
I posted the prayer purse a few days ago and got such an awesome response that I decided I would put together a tutorial. I added a little to this project, too. Since this prayer purse is for a very special friend, I also made her a few small card of encouragement with a box, so she can share the faith with friends.
Here’s what I made today:
Ok, let’s get started…..
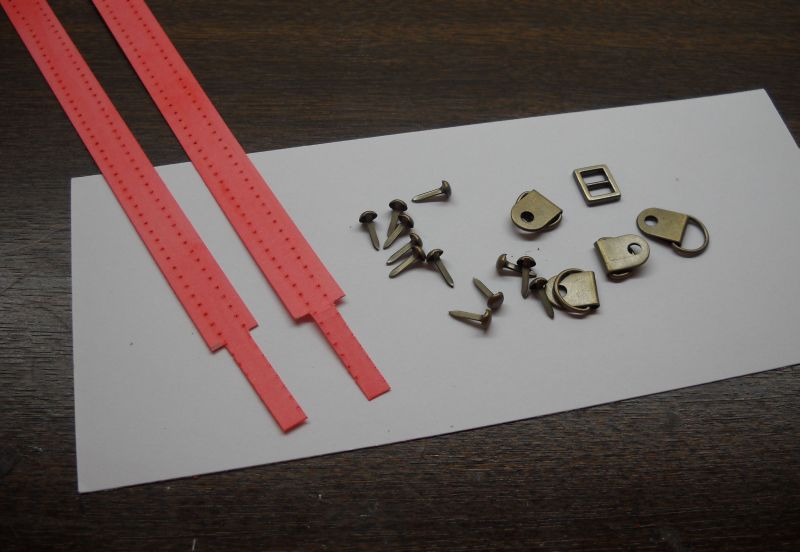
Supplies needed:
1 piece of card stock cut to 4 ¼” x 2 ¼” – scored at ¾” on all four sides (purse base)
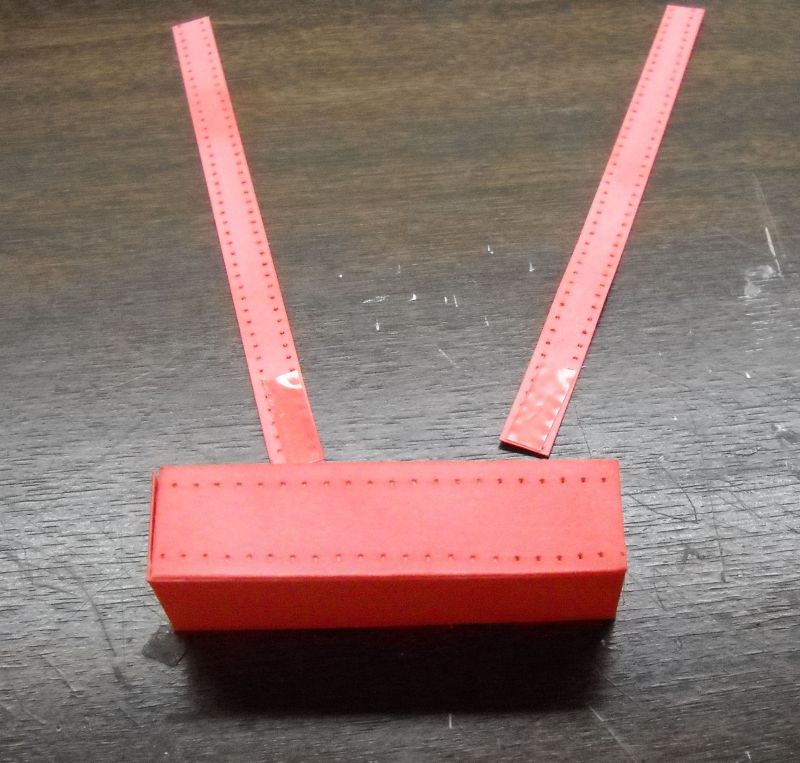
3 strip of card stock 3/8” x 11” – purse straps and piping
2 strips of card stock ½” x 11” – purse handles
1 strip of card stock ¼” x 11” – decorative (optional)
1 piece of designer paper (double sided is best) cut 8” x 5” – scored at 2”, 2 ¾”, 5”, 5 ¾”
Sticky tape or scor tape
Hardware (or other means of attaching handles)
6 pieces of coordinating cardstock cut to 2 ¾” x 2 ¾”
6 pieces of coordinating designer paper cut to 2 ½ x 2 ½”
6 pre-printed prayers with prayer heading
Hole punch
Scoring blade
Supplies to decorate as desired.
Step 1:
Form your purse base into a box shape. I ‘faux’ stitched mine prior to assembly and sponged lightly to highlight the stitching. This part is optional.

Step 2:
Take one strip of 3/8” x 11” cardstock and cut in half. Apply sticky tape to the ends and adhere them at a slight angle to the inside front of your purse base. They will be too long, but you will be cutting them off in a future step.

Step 3:
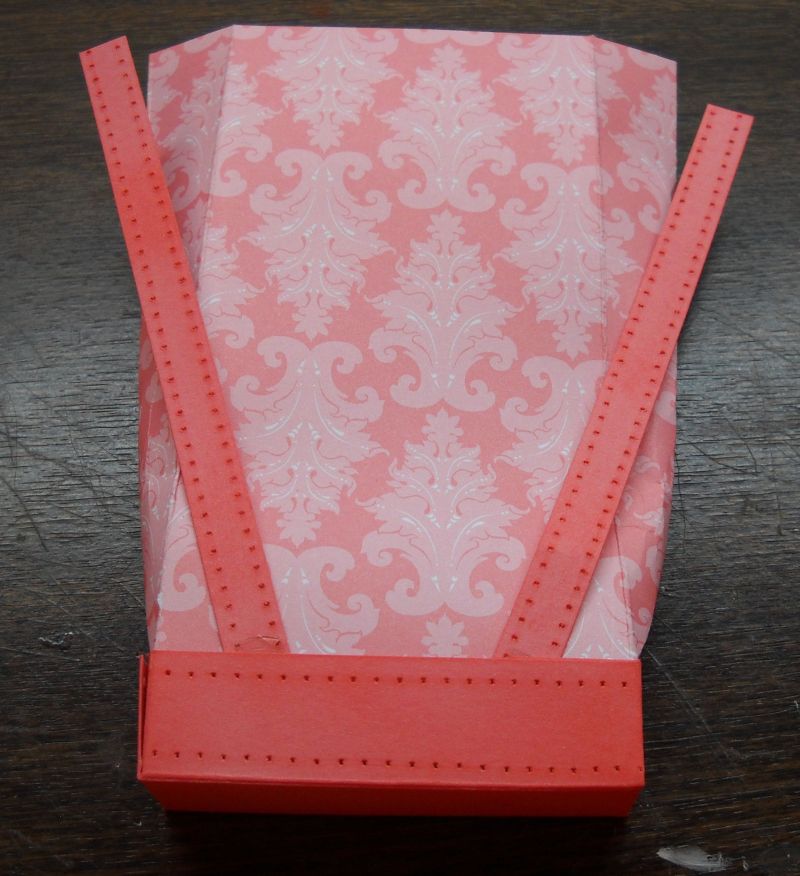
Apply sticky tape to the bottom edge of your 8” x 5” designer paper (notice I do not put sticky tape on the last 2 ¼” area. You will need this loose so you can form the shape after adhering this piece.

Step 4:
Fold the designer paper into the shape of the box bottom and squeeze it together slightly so you can insert it into the purse base. Using a ruler or similar item, press the designer paper against the purse base from the inside.
Step 5:
Holding the purse in both hands, squeeze the sides until they are flat, spreading the designer paper outwards at the top until you get a slight V shape.
Step 6:
Apply sticky tape to the back of the straps and adhere to the bag. You only need to put a small amount as it will be tucked inside the piping at the top in a future step.
Step 7:
Slide your flattened bag, top first into your paper cutter and butt the purse base up to the 3 ¼” mark. Cut the excess off the top. Your purse top will now be straight across the top.
Step 8:
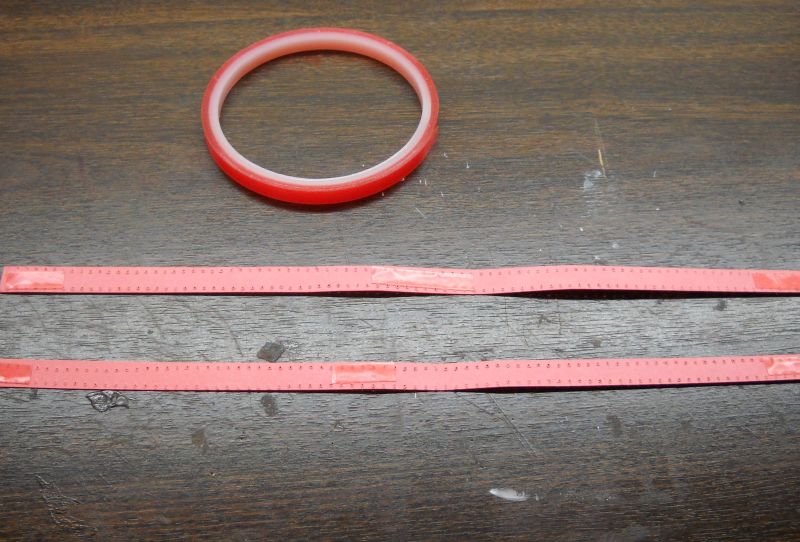
Apply sticky tape every couple inches along the backside of two of the 3/8” x 11” strips. Remove the tape backing and apply this “piping” to the inside and outside top of the purse. I start the inside piece in the corner and the outside piece in the middle of the back. You will likely need to cut a bit of excess off of both of these as you end the application.
Step 9:
Take the two ½” x 11” strips of cardstock and mark each end at 1” with a tick mark. Cut up from the ½” end about 1/16” from the sides to the 1” tick mark. Cut those pieces off. See picture for example. This will allow you to apply hardware that will be sturdy enough to hold the contents. If you have a different idea to apply your handles, skip this step.
Step 10:
Assemble your prayer cards. I used the curvy label punch to form my headers. I adhered them between the designer paper layer and the cardstock layer. Then attach your pre-printed prayer to the front.
Step 11:
Decorate your purse front as desired.
Here are some additional pics….
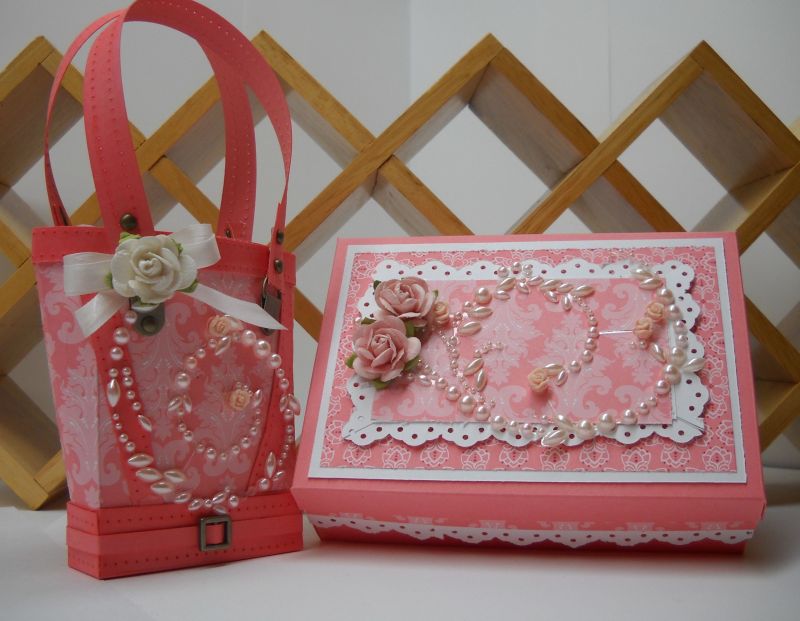
The purse and box with contents inside.

Two of the four cards of encouragement

These cards are 4 1/4″ x 3 1/4″ in size.
The stamps used for these little cards are Verve Plain Janes from Stamp Simply Ribbon Store.
I used GP white and Cameo Coral cardstock combined with some older retired SU! dps.
The ribbon is 1/4″ white silk from Stamp Simply Ribbon Store.
The pearl flourishes are from Hobby Lobby. The mini rose prima flowers are from Stamp Simply Ribbon Store.
The hardware is from an old hodge podge SU set.
Additional supplies used:
Curvy label punch, eyelet border punch, corner rounder, versafine black onyx ink, cameo coral ink, sponge, sewing machine
~*~*~*~*~*~*~*~*~*~*
If you would like a word doc with the prayers I used in this purse, please e-mail me at:
Thanks so much for stopping by! I hope you enjoyed your visit
Hugs!


GORGEOUS!!!!
Love the bag…very pretty colors and great prayer sentiment!
I’ve to try out this bag…thanks for the tutorial! I’m just cleaning up craft place and packing the holiday craft stuff…this purse will be the next project !
Hugs~
WOW! Very very nice!
Can I order one in baja breeze?? LOL
I’m scared to try something so detailed!
Oooh, I want a stamping day like you LOL! Gorgeous project and thanks for the tutorial to go with it. Love the colours and what a wonderful concept.
Wow what a beautifully productive day Holly. Great gift set.
Holly, this is such a beautiful set. I love the whole concept of the project! You are wonderful! Thanks so much for sharing!
Hi friend!
I gave you a “stylish”shout-out on my blog last night!
What a fabulous tutorial and you used some of my very FAV SU DP — LOVE that paper and it’s perfect on this lovely project!!!
WOW! This is awesome. Thanks so much for sharing.
Kindest regards from Australia
Everybody is a moon, and has a dark side which he never shows to anybody.
Very Cute 🙂 I just tried out the purse and it was easy to make. I offten vouleenteer for womens retreats and we make gifts for them. With the prayer cards this will be a perfect idea. Thank You so much for the idea.
God Bless.
Stampinggirl84.