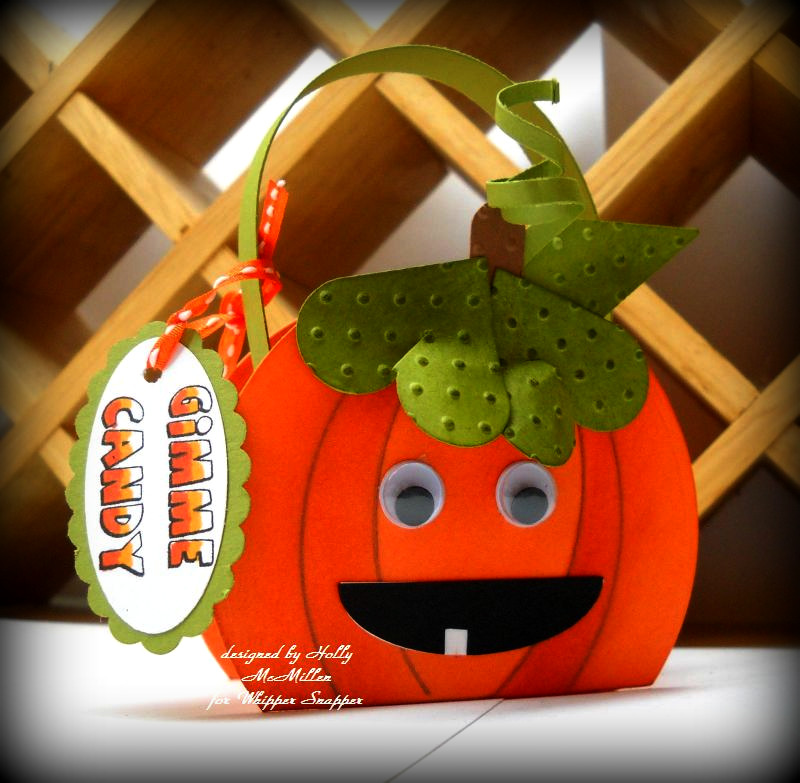
~ Pumpkin Buckets for everyone! ~
October 2nd, 2010 by Holly McMillen
Good morning, friends!
Last year was our first Halloween in this house. I made those cute Frankenstein buckets for the kids in our court. There were four kids. We’ve had a kiddie population explosion this year and now there are TWELVE kids under age 12 in our court. They’re all nice kids and always watch for the cars. So, I am treating them again this year.
This year I made pumpkin buckets. These are so easy to make and I’m going to show you!
You’ll need:
3″ nestie or 3 1/4″ nestie (either will work) ~ cut two (orange cardstock)
1¼ x 1⅜” heart nestie ~ cut three (medium- dark green cardstock) – embossed with swiss dots embossing folder
Orange cardstock cut to 5 x 4 1/4″ – scored at 1 1/2″ on all four sides
Word window punch from medium to dark brown cardstock (cut in half) – embossed with swiss dots
1/8″ x 5″ piece of the same green cardstock – curled around a skinny pencil or paint brush
1/2″ x 8 1/2″ piece of green cardstock for handle
two 1/2″ black circle punches
medium oval punch – white cardstock – cut in 1/2 long way
medium oval punch – black cardstock – cut in 1/2 long way ( cut a small ‘chip’ out of the rounded side.)
2 small brads (any color)
2 medium googlie eyes
pencil
sponge
inks
sticky tape or scor tape
~*~*~*~*~*~*~*~*~*~*~*~*~*~*~*~*~*~*~
Ok, here we go!
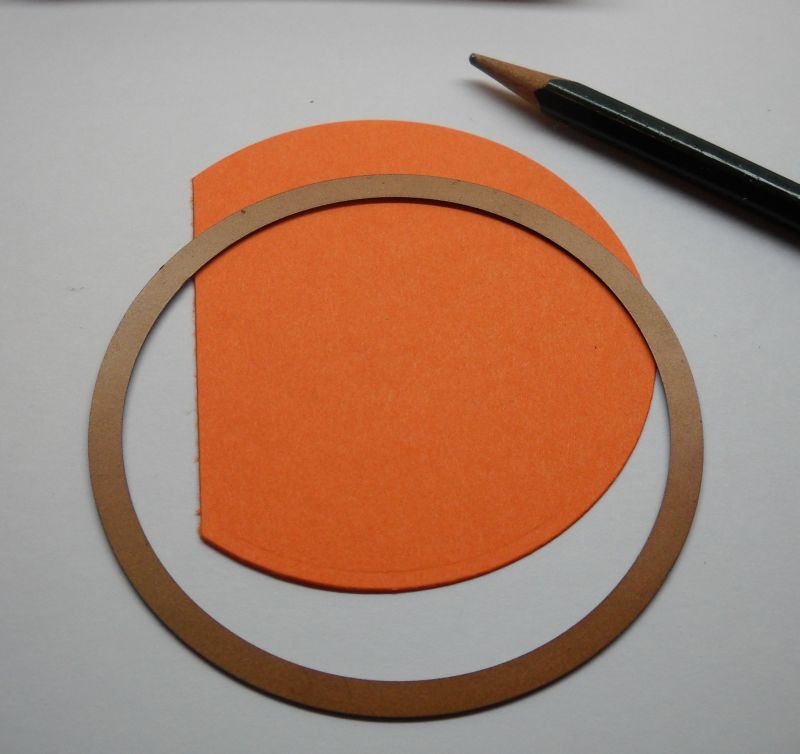
Step 1: slice off a small portion of the circle nesties that you cut to create a flat bottom for your pumpkin.
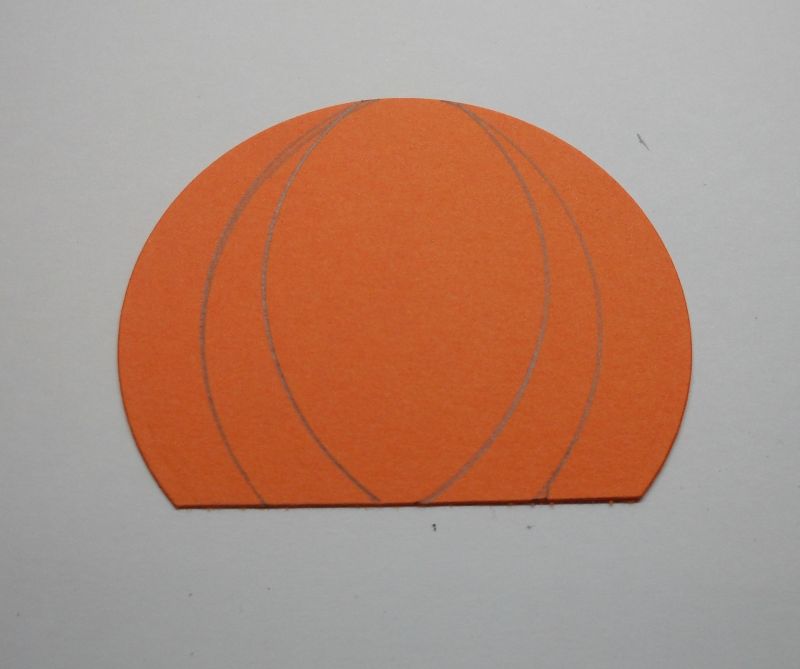
Step 2: Using the nestie that you used to cut the circles as a guide, create ridges in the pumpkin as shown below. Then take your orange and dark orange ink and sponge some texture on to the front facing circle only.
*~*~*
~*~*~*~
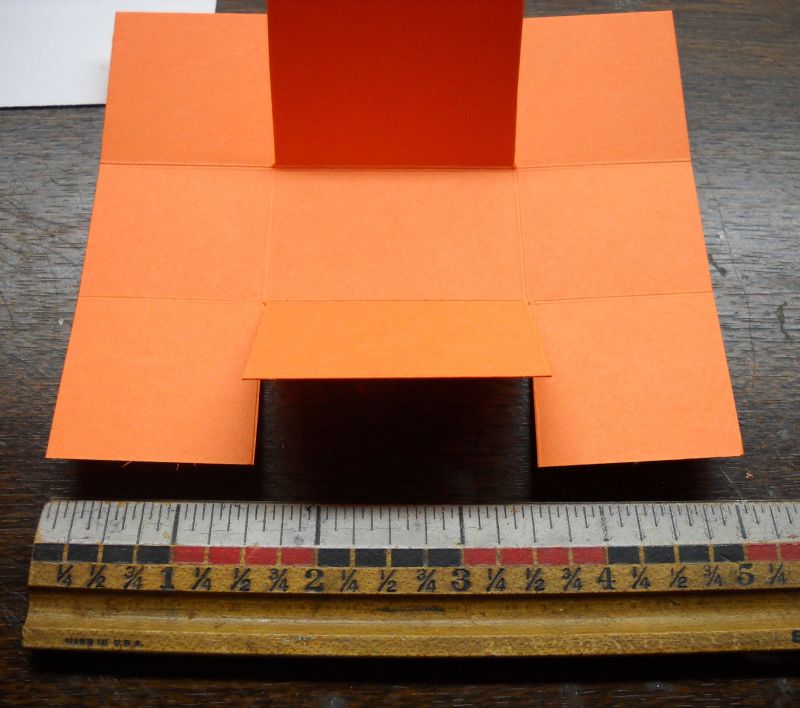
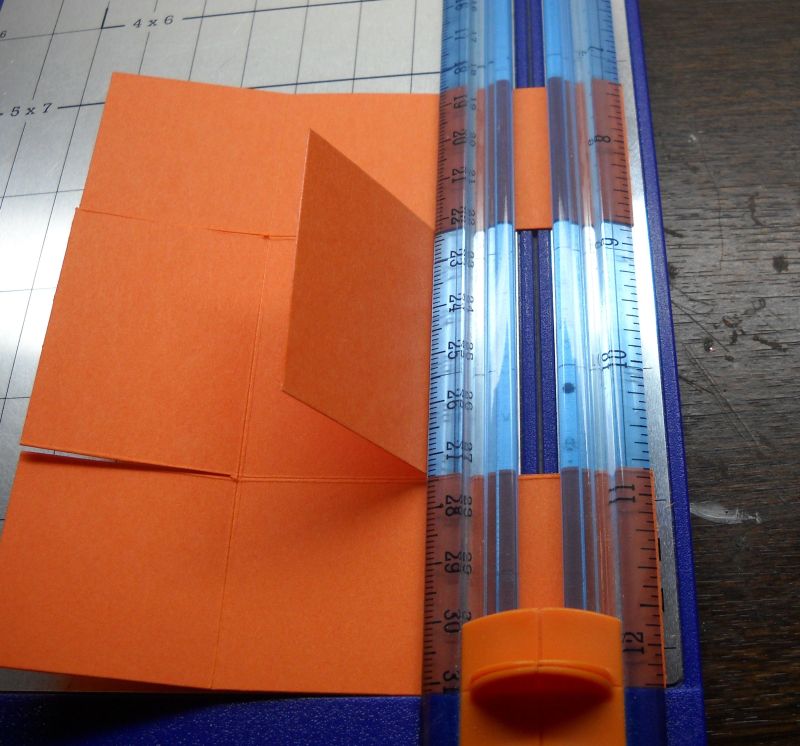
Step 3: Create box as described above. Cut up on the 5″ side to create tabs (see pic). Place in cutter as shown below and cut approximately 1/2″ off each tab. Repeat on opposite side.
~*~*~*~
~*~*~*~
Step 4: Add strong adhesive to the tabs and form box.
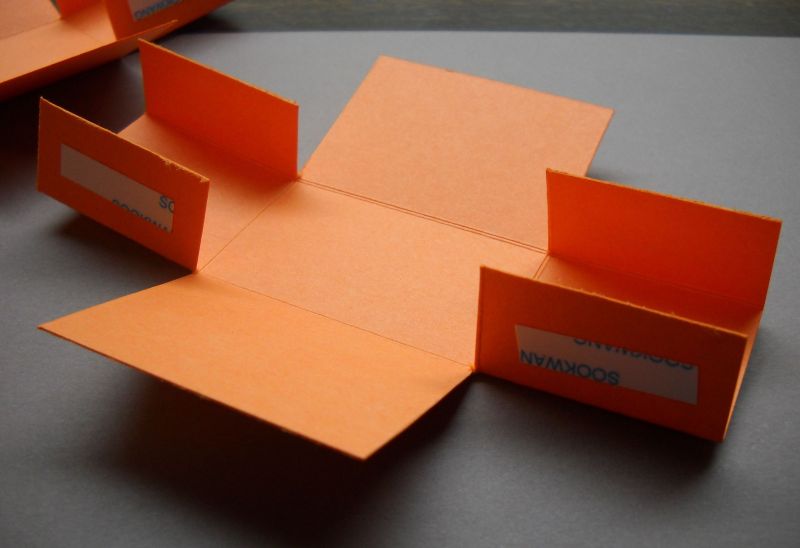
Step 5: Add strong adhesive to the front and back of box (2″ side). Set aside.
~*~*~*~
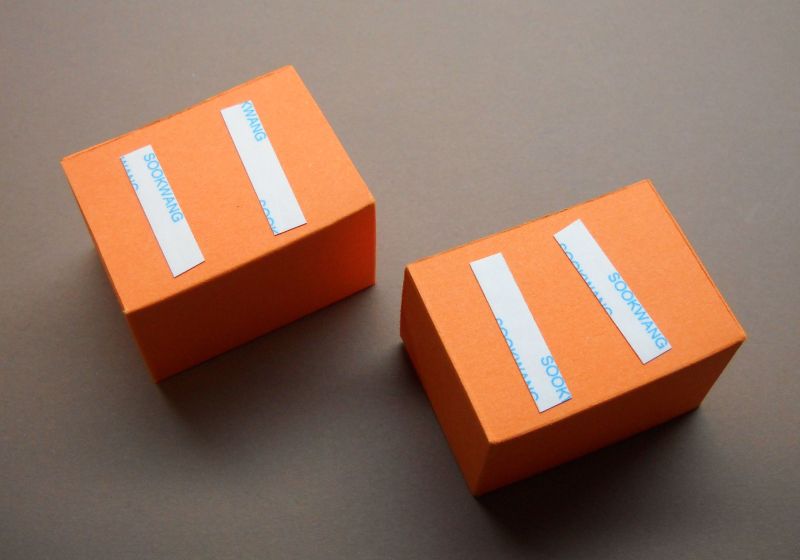
Step 6: Add handle to box. Punch hole in sides of box and ends of 1/2″ x 8 1/2″ strip. Push brad through from the inside so that there is nothing to poke little hands. After you spread the tines on the outside, cover with 1/2″ black circle punches. (** I always tell the parents that these boxes contain small parts**)

Step 7: Sponge the heart shaped cut outs with darker green ink to highlight. Cut one entirely in 1/2 for the leaf. Cut the other two up the center 1/2 way to create the pumpkin top.
Step 8: Sponge word window piece with darker brown ink to highlight.
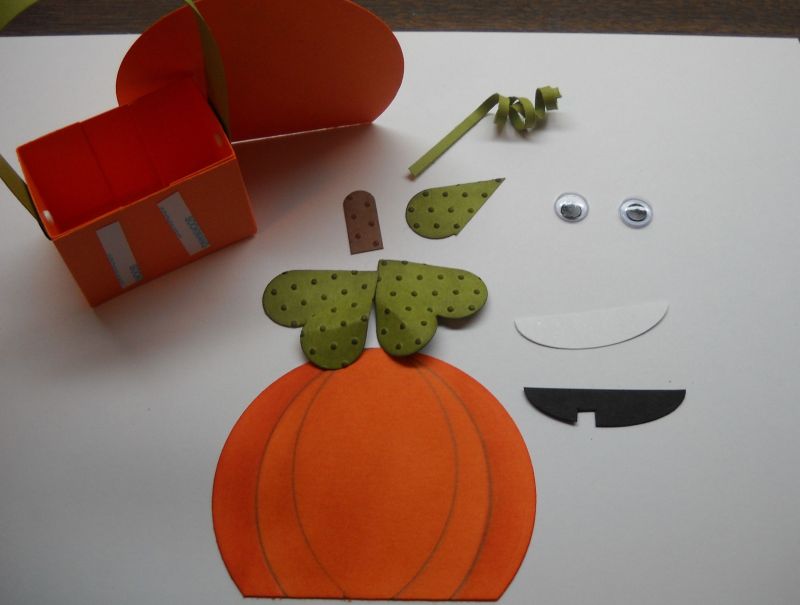
Step 9: Using strong adhesive, layer the spiral piece, the 1/2 cut word window (pumpkin’s stem), leaf, then the two 1/2 cut hearts at the peak of the pumpkin’s top. Adhere mouth piece and then center the googlies eyes above the mouth.
Step 10: Remove sticky tape from box and center front and back of pumpkin on the box.

~*~*~*~*~*~*~*~*~*~*~*~*~*~*~*~*~
Decorate with a tag or leave as is.
Holds approximately four to six pieces of candy, depending on size.
Here are my deets:
Stamps: Gimme Candy from The Witch Is In (Whipper Snapper Designs, Anna Wight, Illustrator)
Colors: Only Orange, GP White, Old Olive, Basic Black
Ink: Versafine Black Onyx, copics, Only Orange, Tangerine Tango, Old Olive, Always Artichoke, Tim Holtz tea bag distressing Ink
Accessories: 1/8″ stitched orange ribbon, googlie eyes, brads, oval punch (medium), scalloped oval punch, circle nestie, heart nestie, word window punch, swiss dots embossing folder, 1/2″ circle punch, scor tape, hole punches, sponges
~*~*~*~*~*~*~*~*~*~*~*~*~*~*~*~*~*~*~*~
Thanks for stopping by! I hope you enjoyed your visit 🙂
Hugs!
Holly


Oh gee wiz woman…you’re so smart, and these are so sweet….you talk about a kid population explosion, you’re going to make a name for yourself and they’ll be bussing kids in!
These are adorable, the kids will love them!
Seriously Toy!! the cutest things EVER!!!! thanks for sharing!!!
They are darling, Holly 🙂 You are going to be everyone’s adopted Auntie! I’m sure they’ll love them!
Hi, I followed your link after seeing this cute pumpkin on SCS. Fabulous tutorial! Thanks so much for sharing it with all of us!!
Hugs
OMG, Holly….your little pumpkin buckets are adorable!!!! Thanks for the great tutorial, too…I’ll be making a few of these for my grands!!!
Holly, this project is fabulous!! I love the font on the sentiment. Great job!!
These are ADORABLE Holly! I wish I had the time & energy to make these for all the kids in our neighborhood, but we get about 40 trick-or-treaters since we live in a pretty big community (yes, I am THAT anal that I counted – I am convinced folks drive here and park for their kids to walk around our neighborhood and trick or treat here, LOL!).
~Meredith
Totally adorable! If my guys were still small, this would be so perfect for a school party!
Hi!
Wanted you to know I posted a link to this tutorial today on my blog, PaperFriendly.
Nancy Ward
PaperFriendly
http://www.nancywardcrafts.com