~Tutorial Thursday presents…..~
January 15th, 2009 by Holly McMillen
*~*~*~*~*~*~*~ Mini File Cabinet Tutorial ~*~*~*~*~*~*~*
Good Morning, Ladies!
Grab a cup of coffee/tea/whatever your drink of choice is and join me for a few! This WILL be a lengthy post, so stick with me… we’re going to have a little fun!
First, a little business….
I think you all will agree that sharing is what makes the world a better place. I want to share this with you. I received an overwhelming response to my blog post and SCS post of this Mini File Cabinet. While it is my intent to always share the GIFTS I have been given, I was a little taken back by a couple e-mails I received in regards to the intended use of this tutorial. So, I am first going to plea to your decency of fair play. I had a vision (I call it that), to make these little desk accessories as a way to help my fellow stampers/crafters. I am not SELLING the pattern as some have suggested. I am giving it to you, freely. What you do with it, is your business, but please don’t make it your business to SELL my pattern or the product thereof for profit, kwim? I ask that you not duplicate my tutorial, though you are more than welcome and encouraged to link your project back here! :). I also ask that you do not submit your project for publication, as I reserve that right.
I realize that is a little bit of a bummer way to start, but it had to be said, considering the nature of the beast. Now, I think of you all as my FRIENDS, so please take that last paragraph as a plea from a friend to friend. Now let’s have some fun!!
*~*~*~*~Please NOTE: All pictures are ‘clickable’ to create larger photos!
Here is what you’re going to need:

1 pc of cardstock (or heavy designer paper as I have used) measuring 12 x 12″
2 pc of cardstock (important that it is cardstock here) measuring 8 5/8 x 8 5/8″ each
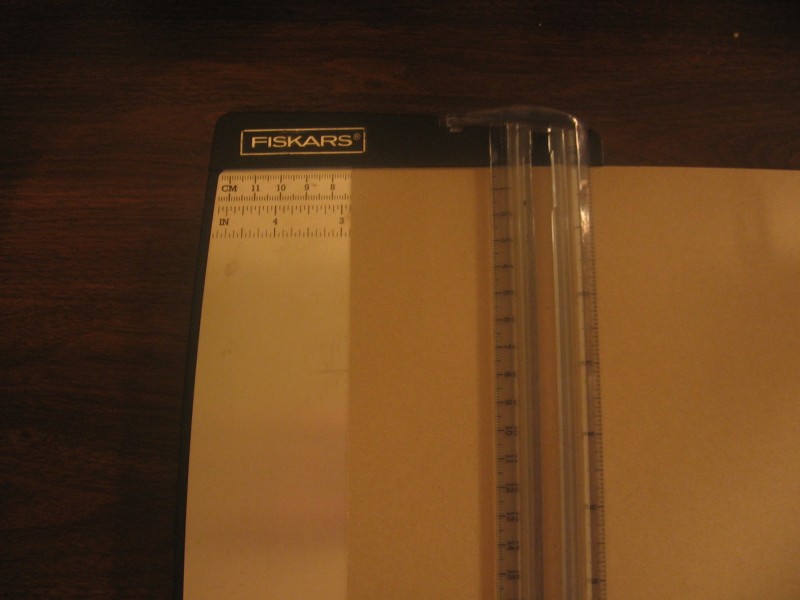
Paper cutter
Scoring blade
Sticky Tape (use 1/4″ or wider to make a sturdier cabinet!)
Ribbon
Brads and hole punch
** coordinating cardstock and/or dp to decorate your drawers**
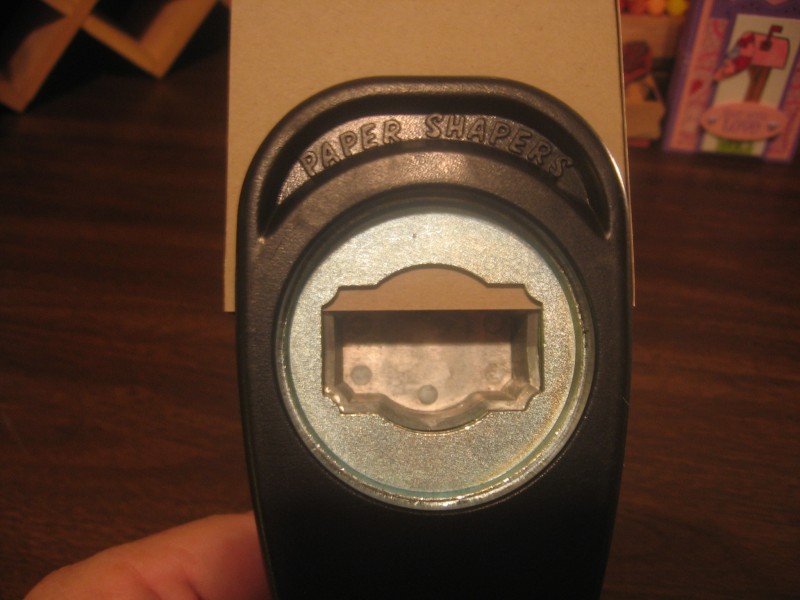
Designer label punch (or a small circle punch will work)
Word window punch (for your drawer labels)
Ok, here we go!!
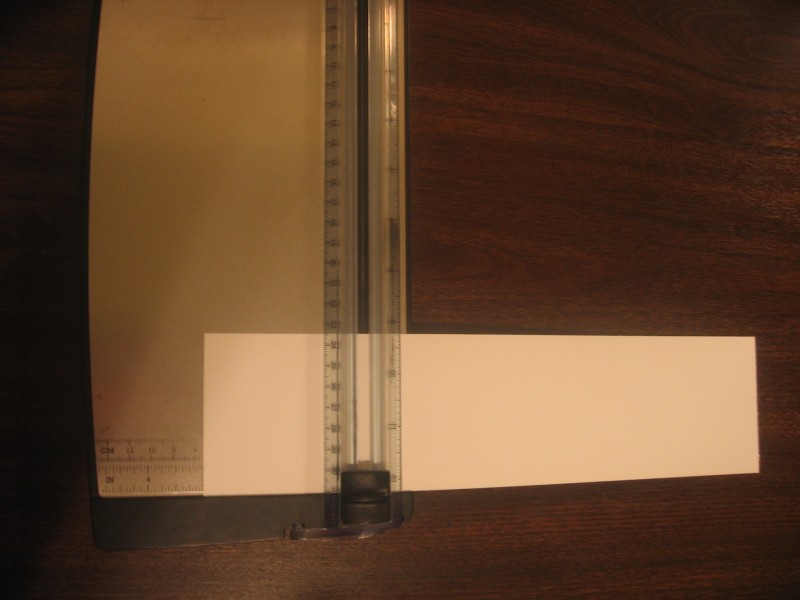
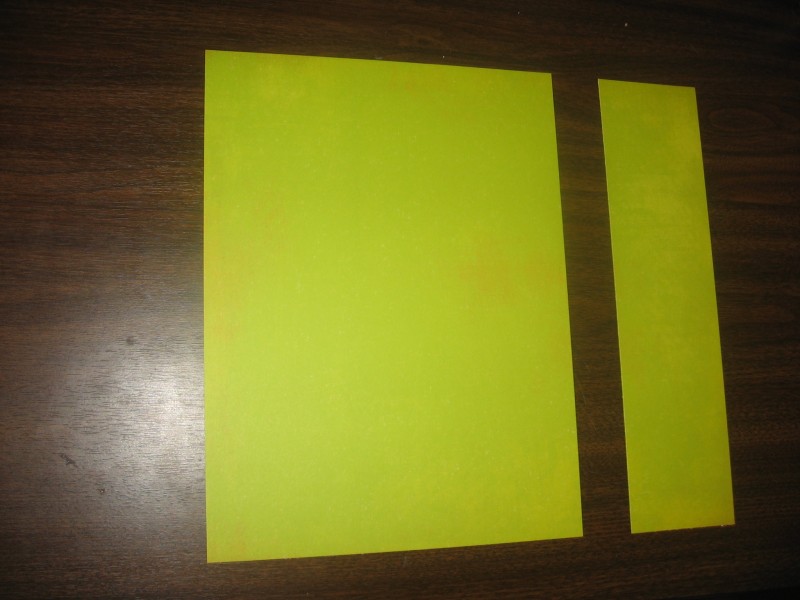 Step 1: Cut your 12″ x 12″ paper to 12″x9″ – saving the 12″ x 3″ strip aside…. we will use that later.
 Step 2: Score your 12 x 9″ piece at 3″ on all four sides.
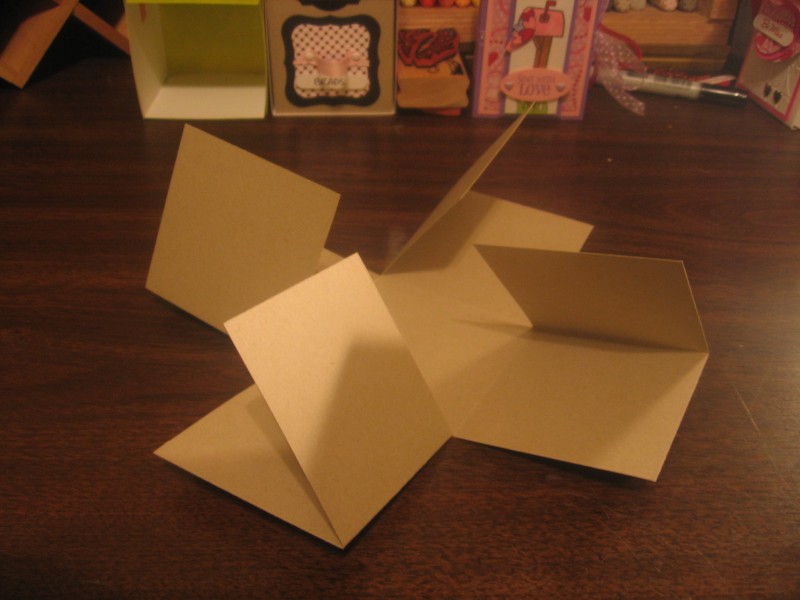
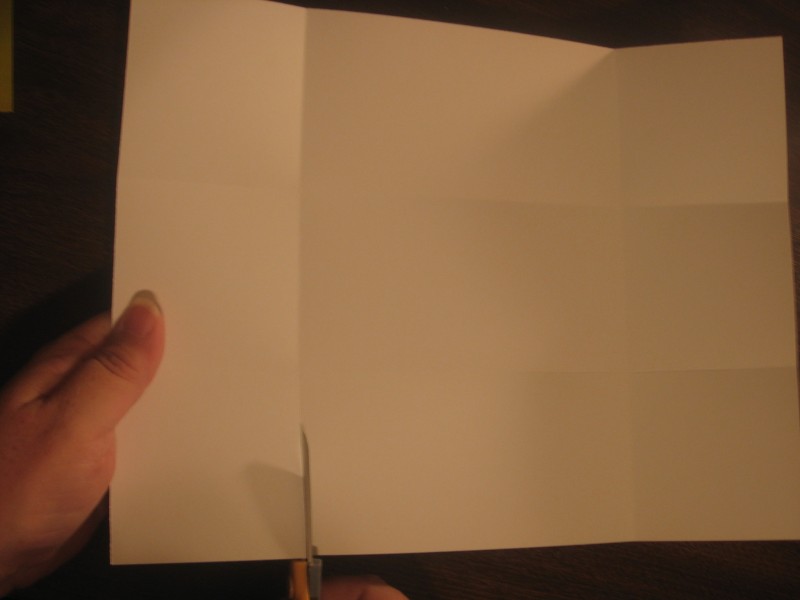 Step 3: working from the 12″ side, cut up on the score lines from the edge to the 3″ score (as shown).
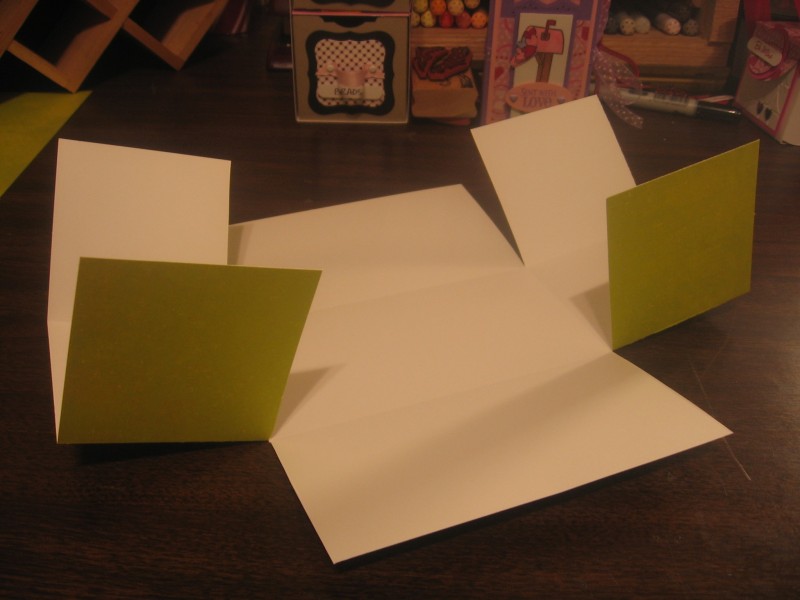 Your piece will look like this when you are done.
 Step 4: Apply sticky tape to the tabs as shown.
 Step 5: Assemble your cabinet ‘frame’ and set aside
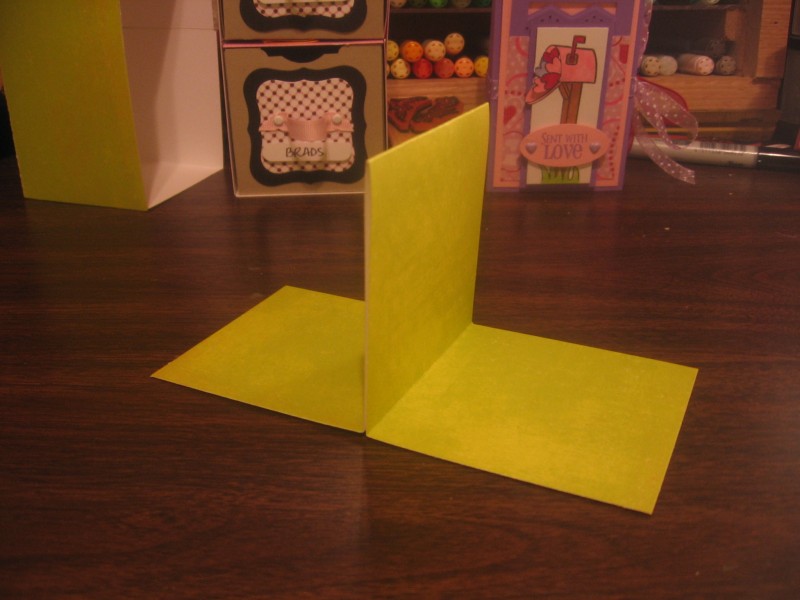
 Step 6: Take your leftover piece of cardstock/designer paper measuring 12″ x 3″ and score it at 3″, 6″ and 9″.
 Step 7: Flip it over and apply sticky tape to 3 of the four squares you have created.
 Step 8: Remove the redline backing from the center square piece and press the two center squares together as shown.
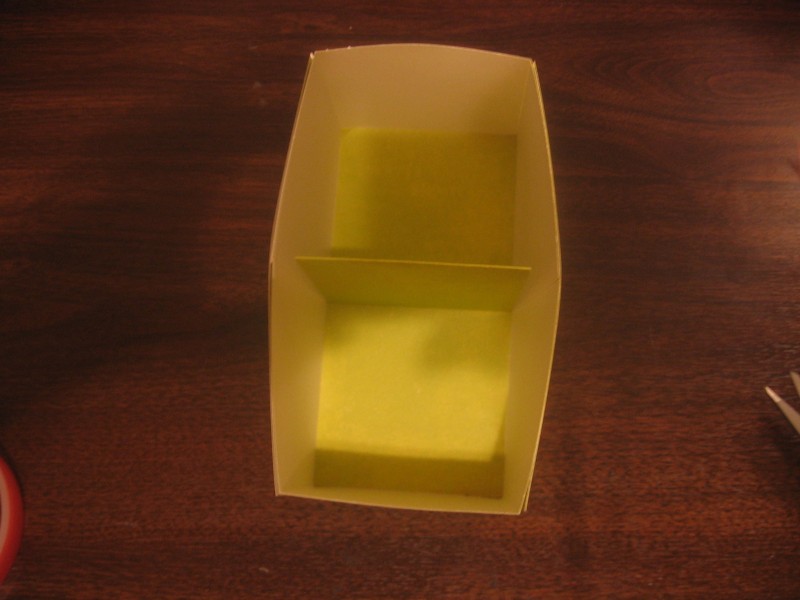 Step 9: Remove the remaining redline backing and afix to the inside of your file cabinet as shown. Please note: Your filing cabinet is not yet stable…. this next step is VERY IMPORTANT!
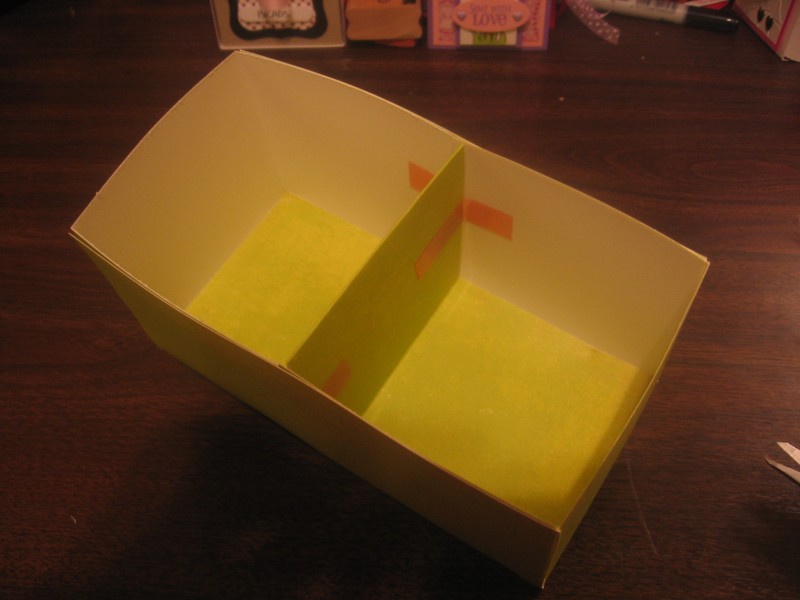 Step 10: Create “shims” to hold the center piece in place by cutting 2″ strips of sticky tape and afixing them inside the box as shown. Do NOT remove the redliner from the sticky tape. I have shored mine up on both the top and bottom of my ‘shelf’ on both sides. This does not interfere with the drawers and cannot be seen once we assemble.
 Step 11: Score both pieces of 8 5/8″ x 8 5/8″ cardstock at 2 7/8″ on all four sides. Please note that it is important that you score at 2 7/8″ on these pieces or the drawers will not fit in your cabinet!
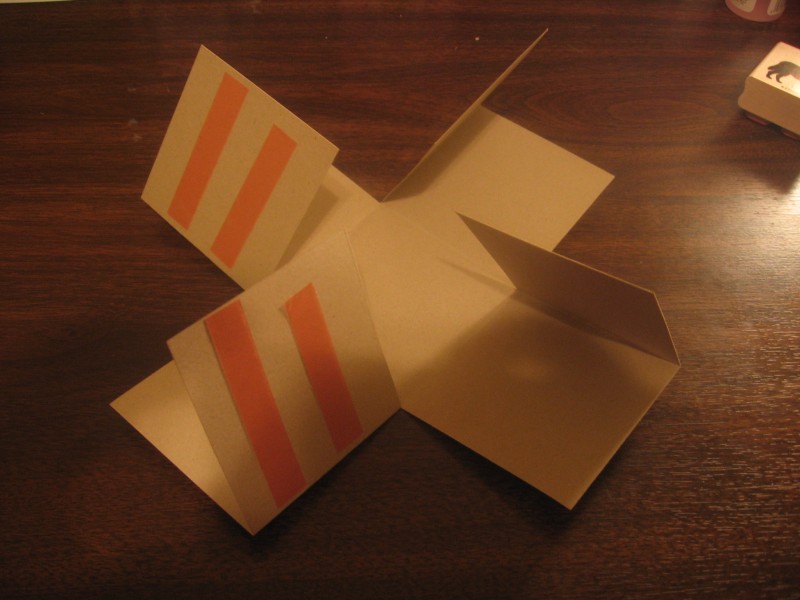
Step 12: Cut up from the edge of your cardstock to the 2 7/8″ score line on all four sides as shown
Your piece will look like this:
 Step 13: Apply sticky tape (generously!) to the tabs you have created and then assemble your box/drawers.
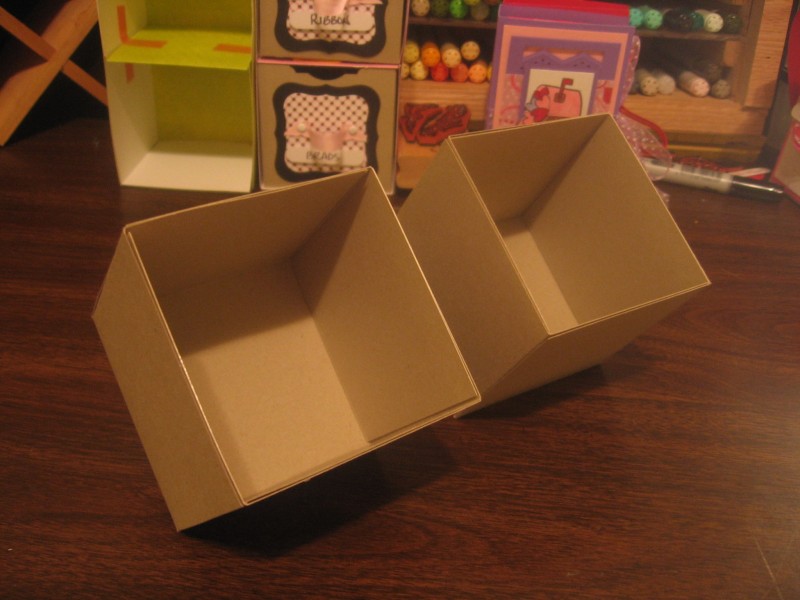
 Step 14: Using your designer label punch, or a punch of your choice, create a small lip in the drawer for additional access.
 Step 15: Now it is time to decorate the front of your drawers!
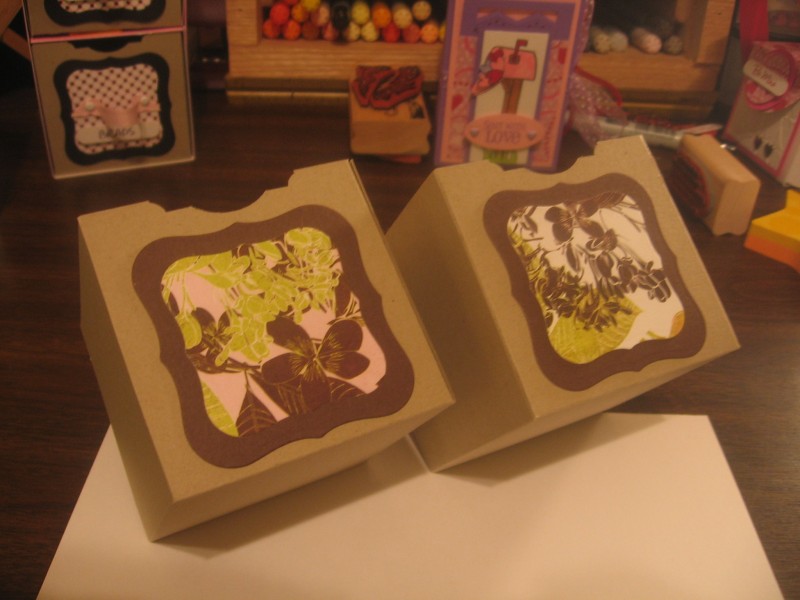 For mine, I have used nesties dies.
Step 16: Cut strips of ribbon for your drawer pulls. I placed a small dot of adhesive on the ribbon back where I wanted it to stick to the drawer front. I did not take a picture of that as I didn’t want to insult your intelligence! LOL
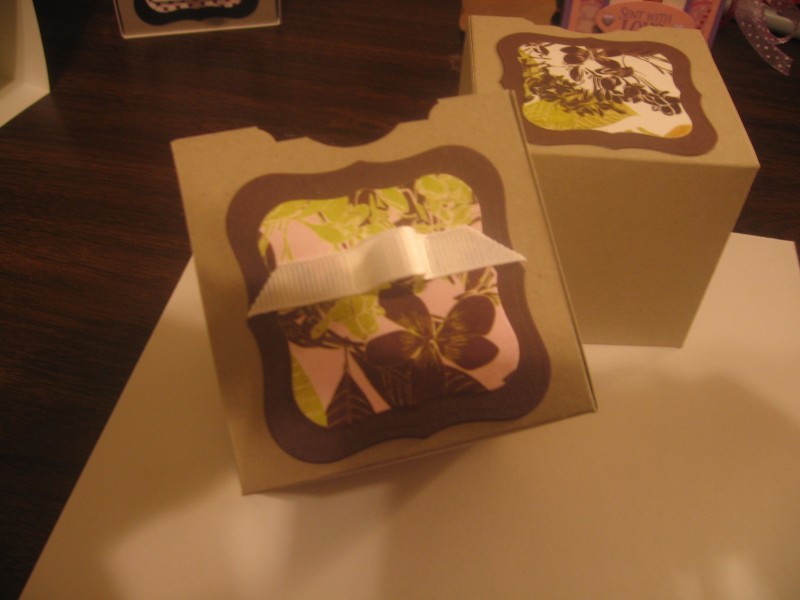
Step 17: Adhere your ribbon to the front of the drawer and use the hole punch to create holes for your brads. AFTER I afixed the brads in place, I snipped off the ends of my ribbon to the appropriate length.
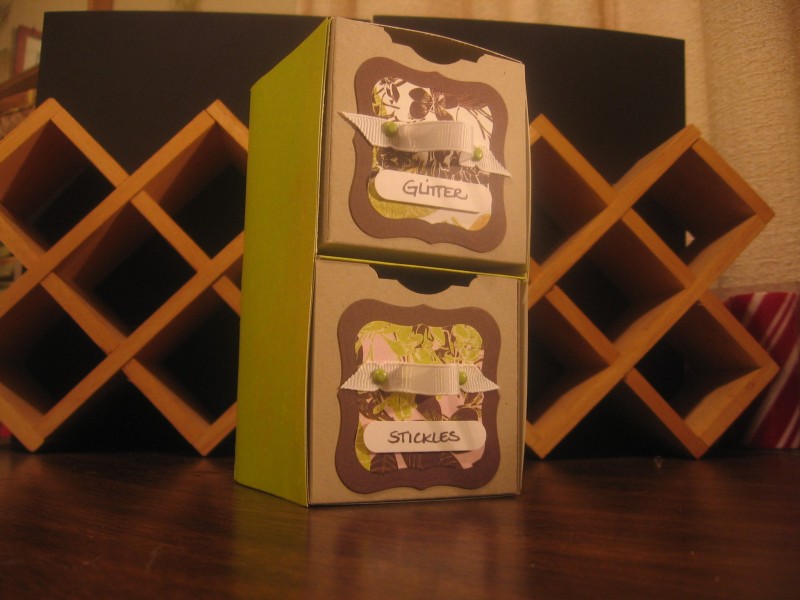
Slides your drawers into your cabinet and you are done!
NOTE: I placed a small piece (1/4″ x 1″) of dimensional (with the backing still on it) under my top drawer… it creates a tighter fit and it holds the drawer in place better (yeah, this may be the design flaw I was waiting for, but for now, it works really well!).
Ok! How fun was that?!
I have spent quite a bit of time walking you through this and preparing the tutorial… won’t you please leave a comment letting me know how you liked it? I would really appreciate the feedback! 🙂
Thanks for stopping by and please have a blessed day!


this tutorial is great =) lovely cabinet you have created too =)
Holly. Great filing cabinet and great tutorial. I can’t wait to give it a go! Hopefully next week. Looking forward to working through this and some other of your tutorials that I have now spotted. I love you crafting!! Cheers…. Amanda
What a cute cabinet! Thanks for the detailed tutorial … I may just have to try making one of these.
Looks like fun! Thanks for taking the time to prepare the tut.
Holly, you sure are one generous stamper!! wowee! can’t wait to try this one!
How flipping cute is that?
Thank you for sharing this with us.
This is my first time at your blog, a friend shared it with me. I’ll definitely be back. 🙂
Thanks for sharing, can’t wait to try it out. Sorry you’ve had some ugly comments.
Love it Holly! Very well written!!! Now I hope that some other parent’s volunteer for the field trip so I can stay home to craft!! Thanks for the tutorial…can’t wait to try it out!!
Fabulous idea and great tutorial, Holly! Darling project — I love it!
This is one of the cutiest ideas I have seen. I am going to make one. I just love small storage things like this.
Thank you so much for sharing it with us.
Wonderful!! Thank you for sharing the tutorial. I’ll definitely make one, too!
Hello my friend!
Your tutorial is fantastic-very well laid out and I love that you can click on the pics! Definitely going to give this one a go!
Ann
Nice tutorial! I really like your filing cabinet and appreciate your sharing your design – we all need more small places to store things.
Love your tutorial, Holly; can’t wait to give this file cabinet a try! Thanks for sharing with such detail.
Wowsers, that is just brilliant. I am definately adding your blog to my fav’s.
Thank you so much for sharing!!
I love, love , love this! Thank you so much for making this into a tutorial! Yeah!!!
Becky
Great job, Holly. These are simply wonderful!! Your spacial/creative mind is amazing 🙂
Good for your for laying down the “ethic and etiquette rules”. Sad that it has to be done, but glad you did it!!! I’d submit away sooner than later because some just don’t play by the rules (as Lauren Meader has found out) and should be ham strung from a goal post!!
Thanks for sharing with us!!. I’m going to have to make one for my DD to put her jewelery and little goodies in . Going to tuck it away for her next B-Day party too. Have a great day!.
You are an incredibly talented woman. I am always amazed at this kind of talent as I cannot seem to come up with such amazing ideas as this. Thank you so much for this awesome idea and tutorial…very well done! I can see making this for a special person that would really appreciate the work involved! Love it. Love your sight. I have been peeking at it from time to time and will probably come here more often in the future. Thanks again for your unselfish work to post this time consuming tutorial!!!
Adorable! You’re very generous to share your time and creativity with this tutorial!
This is my first time to your blog. You are so creative, thank you so much for sharing. I love your filing cabinet. I can’t wait to give it a go.
I love this little filing cabinet. Thank you for doing a tutorial on it. I can’t wait to get started on one.
WONDERFUL file cabinet.. FANTASTIC tutorial!! Thank you for sharing Holly!! I won’t forget whose fabulous idea and creativity this was!!
GREAT tutorial!!!!!!
Thank you so much for all that hard work.
~~Diane~~
what a great tutorial! I love it,, I love making things with paper. I will be making a couple of these for my office and my daughters, Thanks again!!
This is absolutely BRILLIANT! I am SO going to make this for my DS’s teacher. TFS.
I love this! Thank you so much for sharing the instructions. If I could figure out how to do it out of an 8 1/2 x 11 piece of paper, I’d be one happy stamper!
What a terrific tutorial. I made one of these and by golly it turned out. Thank you for sharing this. I keep my punched flowers and leaves in the drawers and think I’ll make another one. Easy to follow instructions for an awesome project. Thank you again for your generous share. Terese
Thanks for all the work you put into this Holly. My niece has a birthday coming up and I think this little cabinet would be perfect (stocked of course with embellishments!). I really liked how you used the designer label punch in a non standard way. Gave me an idea for creating my own “die” cut type layers.
Hugs and blessings and congratulations on being a guest designer on ODBD. – Jean
Thanks ever so much for this tutorial and furthermore thanks for all your information and tutorials that you share so freely it is truly appreciated.
Regards
Dell
Thank you!! I love to build things like boxes and this little file cabinet will really come in handy. I plan on making several for my craft table and probably one or two for my bedside table. I may even make some for our RV to hold things like cotton balls, etc. Thank you so much for sharing!
Madonna
Holly, your directions are GREAT!! I had no problem following them and easily made one of your “mini” filing cabinets to give to one of my friends!! She is going to LOVE IT!!! Thanks for sharing your talent with all of us!! 🙂
Holly,
You did a wonderful job with this project and tutorial. I hope to give this a try this weekend. Thanks
Holly,
Thanks for the tutorial, I am very grateful for this, and hope to try it real soon. You are a very special person to share like this.
first timer, just loved your cabinet. will try one later, just finished writing down your directions since i don’t have a printer in my craft room on computer. thanks chris
love this cabinet. going to make one soon.
This is awsome! your tutorial is sooooo easy to follow and the result is incredible, I also think that sharing is what makes a better world, I do not understand why people wants to make business all the time, this is a hobby!!!!!
Thanks for sharing!
Thank you for giving of yourself with the idea and tutorial. Love the idea!
Tods is an Italian brand, shoes, covering appurtenances and added affairs articles articles and chaired by agent Diego Della Valle. Synonymous with acceptable above and Italian style, makes the Tod’s products, the alluringly simple and affably practical. The cast craftsmen plan with the world’s a lot of comfortable covering and anniversary section has the incomparable attending and feel can “truly handmade.
The weather improved a lot, this several day warm sun shine on the earth, let the thicker. Spring is a time of germinal, flowers and trees start to show a green, the same spring is Yang Melhado season, the weather gets warmer, the human body the new supersedes the old. Faster, this is you feel sleepy in spring.