~Valentines Candy Box Cover~ Tutorial~
January 9th, 2009 by Holly McMillen
Good Morning, Ladies!
Welcome to my Friday. It is going to be a busy busy day. Won’t you come along for the ride!?
First, I have the Candy box cover tutorial that was requested by many of you. I realize it has taken me a few days to get to it, but it has beeen hectic around here!
**************** CLICK ON PHOTOS TO MAKE THEM BIGGER ***************
Supplies needed:

1 piece of cardstock measuring 4 1/4″ x 6 3/8 ”
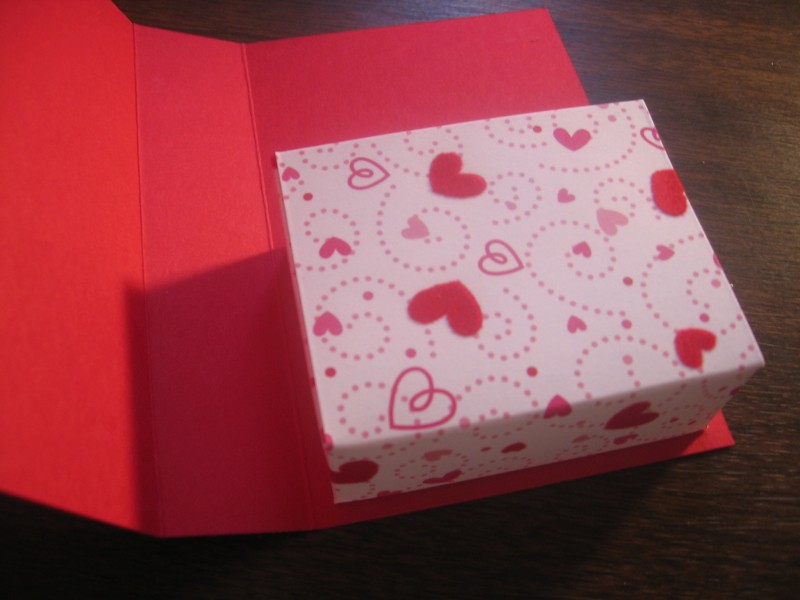
1 piece of heavy designer paper (double sided or cardstock type works best) measuring 4 7/8″ x 6 3/8″
Sticky tape
Scoring Blade
Ribbon
Stamps, etc. to decorate the outside.
 Score the designer paper at 2″ on all sides.
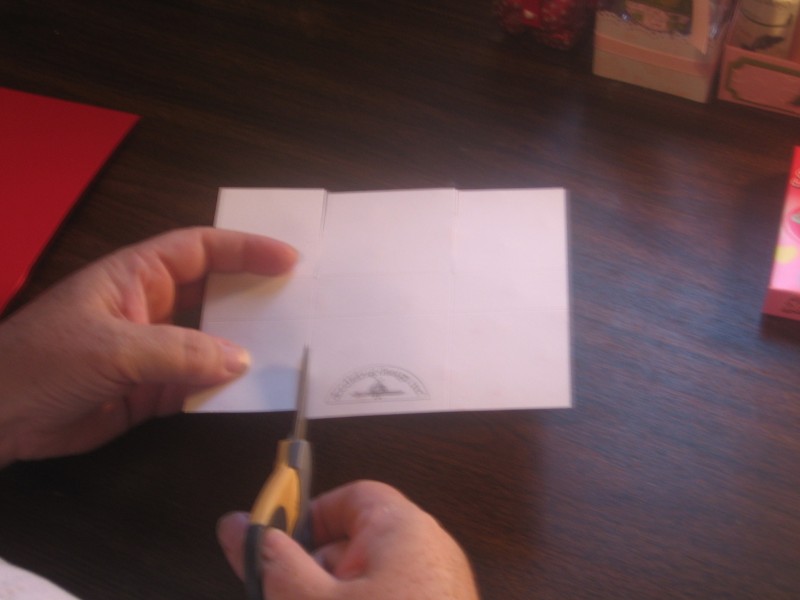 Cut up on the sides to create tabs (as shown).
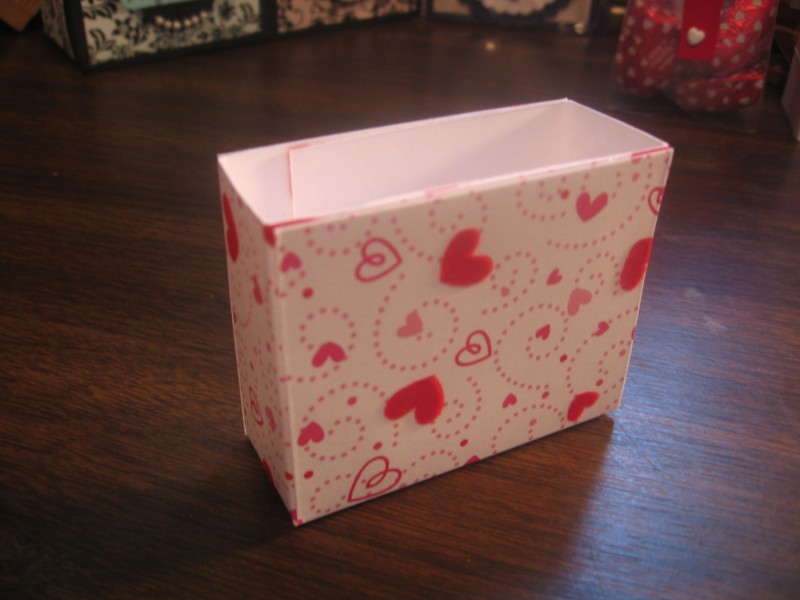
 Apply Sticky tape to the tabs and form your box.
 Set aside for later
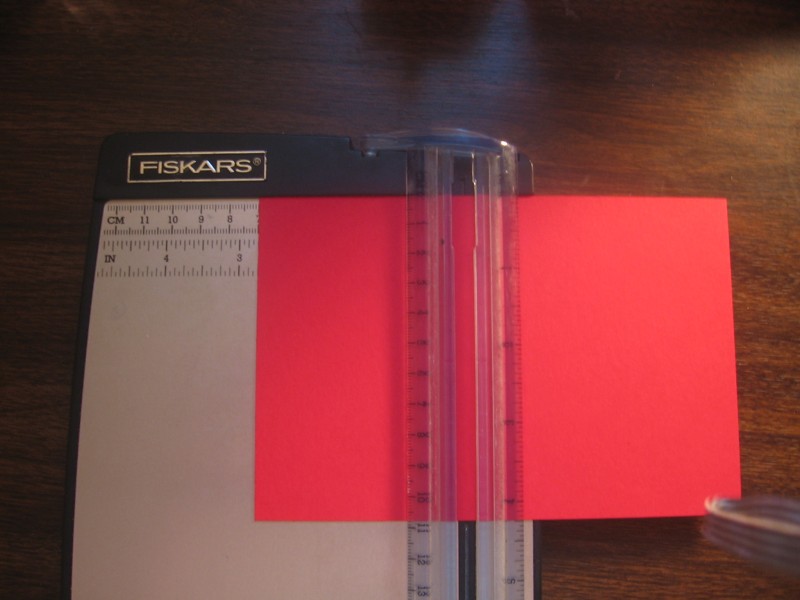 Score the 4 1/4″ x 6 3/8″ piece of cardstock at 2 3/4″ from each side, along the 6 3/8″ side.
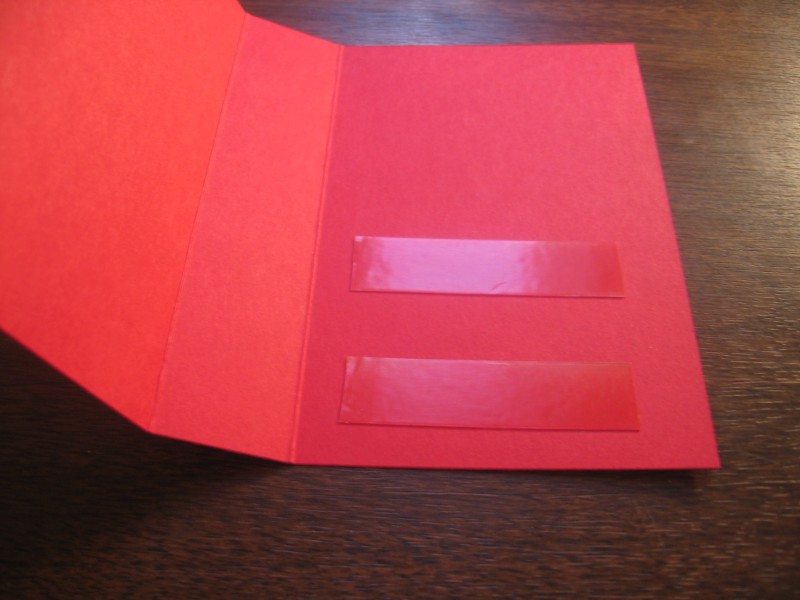 Apply sticky tape to the inside of this piece to adhere the previously made designer box.
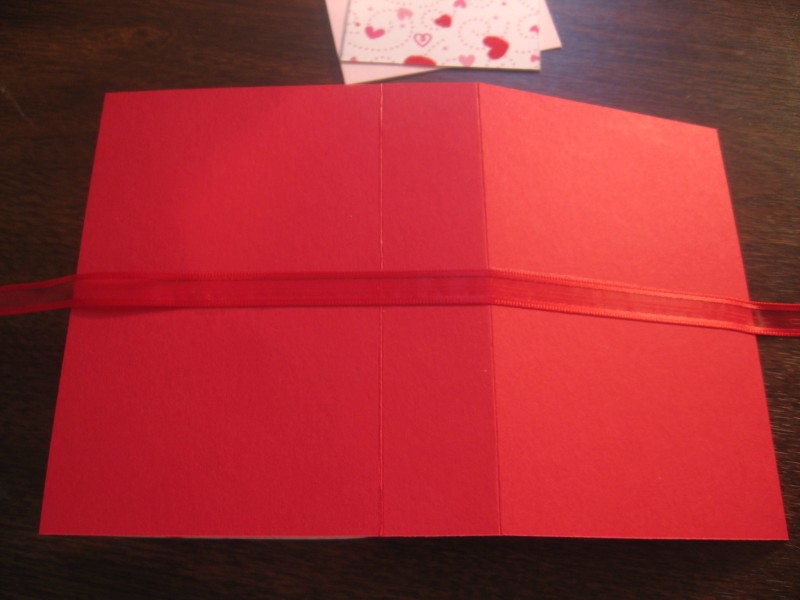 Apply adhesive across the back of your box and afix ribbon for closure.
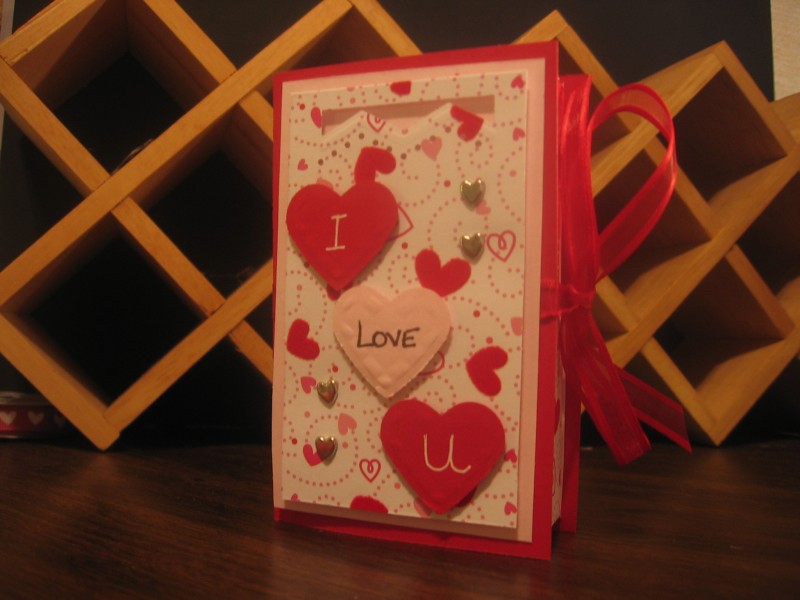
Decorate front of box and voila! You’re done!
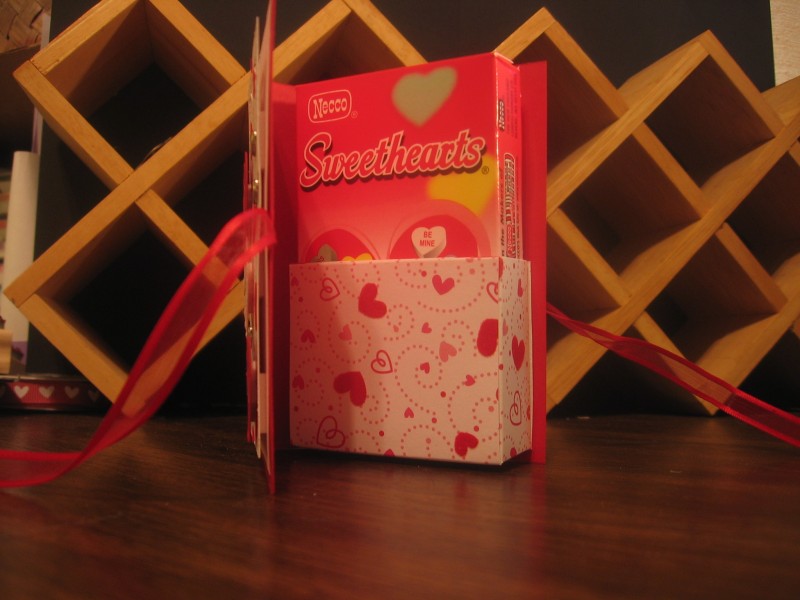
Hope you enjoy! If you should have any questions on any of these steps, please do not hesitate to contact me at [email protected] !
*********************************************************************************
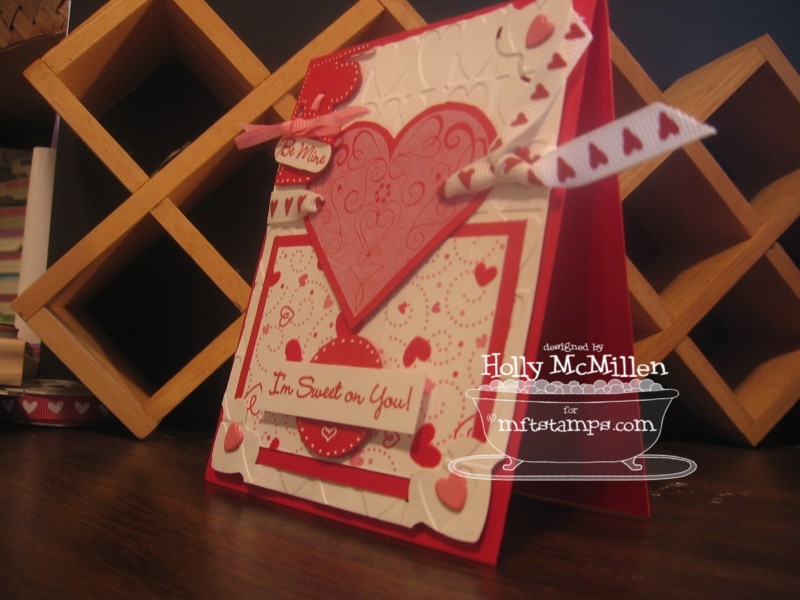
~Hearts Galore~
 Ok, so today’s Limited Supply Challenge felt so unlimited to me… here are the details of the challenge:
Here is your challenge…to use a heart…any heart!
*Stamps: Any (bonus points for using a heart image!)
*Paper: any + red…any shade of red
*if you use a punch or die it must be heart shaped
*if you use embossing folders…they must have a heart
*if you use an accessory it MUST be heart shaped or red
*if you use designer paper…yup you guessed it, red or hearts!
Now, as opposed to yesterday’s challenge, I am NOT heart challenged. I have hearts in all different shades and sizes and let’s face it, I have too many hearts…lol… and for some reason, i decided to put them ALL on this card.
I cuttlebugged the background with hearts. I punched the corners with hearts. I used heart brads, heart ribbon, heart punches! I went heart crazy!!! I even drew a little heart on the sentiment tag 🙂 Betcha never saw so many hearts in all your life! LOL
Anyway, I managed to get the challenge done and I’m not hating all the hearts either. Hearts are good 🙂
Here are my deets:
Stamps: Boho Blossoms and Be Mine (both are My Favorite Things!)
Colors: GP White, Real Red, Doodlebug DP
Ink: Real Red, White Craft
Accessories: heart brads, heart ribbon, heart nesties, corner punch heart, scissors, hole punch, word window punch, circle punch, white gel pen, pink ribbon, dimensionals, heart ef!
Well, TFL and have a wonderfully heartfilled day!


I think you’ll win for using the most hearts on a card 🙂 Wonderful job. I’m with you on the hearts too – love them and have a much better supply to draw from than stars.